Ah, the nostalgia of childhood treats! Among them, zebra cakes stand out with their distinctive stripes and delightful sweetness. But, why settle for store-bought when you can recreate this classic at home? In this comprehensive guide, we’ll embark on a culinary adventure to craft homemade zebra cakes that not only taste like the original but also bring a touch of personal flair to your baking repertoire. From the basics of the cake base to the intricacies of the filling and coating, we’ve got you covered. So, preheat your ovens, and let’s dive into the world of baking these iconic treats, ensuring every step is as fun and rewarding as the final bite.
Remember those little striped cakes that seemed like a treat from another world? Well, they’re not just a figment of your childhood imagination. Zebra cakes, with their soft cake layers, creamy filling, and distinctive chocolate stripes, have been a beloved snack for generations. But here’s the kicker: making them at home is easier than you think, and oh, so satisfying.
What Makes Homemade Zebra Cakes Special?
First off, when you make zebra cakes at home, you control the ingredients. Want to go vegan? No problem. Gluten-free? You got it. Plus, the process itself is a blast. There’s something magical about pouring that chocolate to create those iconic stripes and seeing your kitchen transform into a mini bakery.
But, let’s not get ahead of ourselves. Every masterpiece starts with a foundation, and for zebra cakes, it’s all about the cake base. So, roll up your sleeves, because we’re about to get into the nitty-gritty of making the perfect zebra cake base that’s fluffy, moist, and just begging to be filled and coated with chocolatey goodness.
Stay tuned, because by the end of this guide, you’ll be a zebra cake wizard, ready to dazzle friends and family with your baking prowess. And who knows? This might just become your new go-to treat for all occasions. Let’s get baking!
I hope this introduction sets the stage for a delightful baking journey. Stay tuned for the next part, where we’ll dive into the ingredients and substitutions, ensuring your zebra cakes are not just delicious but tailored to your dietary preferences and needs.
Ingredients and Substitutions
Diving into the heart of our zebra cake adventure, the ingredients play the starring role. Whether you’re sticking to the classic recipe or looking for alternatives to fit dietary restrictions, we’ve got all bases covered. Let’s break down what you’ll need and explore some handy substitutions to ensure everyone can enjoy these delightful treats.
Ingredients Overview
Crafting the perfect zebra cake requires a balance of simple yet quality ingredients. Here’s what you’ll need for the cake, filling, and that iconic coating:
- For the Cake:
- 150 grams all-purpose flour
- 1 tablespoon baking powder
- 1/8 teaspoon salt
- 1/2 cup melted plant-based butter
- 1/2 cup granulated sugar
- 1/2 cup milk of choice
- For the Filling:
- 1/2 cup cold heavy cream
- 1 tablespoon maple syrup
- 1 teaspoon vanilla extract
- For the Coating:
- 3/4 cup white chocolate chips
- 2 tablespoons boiling hot water
- 1/4 cup dark chocolate chips
Substitutions
Now, let’s talk tweaks. Whether you’re accommodating allergies, dietary preferences, or simply using what you have on hand, substitutions can come in handy.
- Flour: Gluten-free? A 1:1 gluten-free flour blend works wonders. Just make sure it’s suitable for baking.
- Sugar: Coconut sugar can replace granulated sugar for a less refined option, though it may slightly alter the cake’s color.
- Butter: Dairy butter works if you’re not vegan, but for a healthier twist, coconut oil is a great substitute.
- Milk: Any plant-based milk (almond, soy, oat) will do. For those not avoiding dairy, regular cow’s milk is just fine.
- Heavy Cream: For a vegan filling, canned coconut cream chilled overnight can be whipped into a lush, creamy texture.
- Chocolate Chips: Vegan options are available for both white and dark chocolate chips, ensuring everyone can enjoy the zebra stripes.
Remember, baking is both an art and a science. While substitutions can offer flexibility, they might also slightly change the texture or taste of your cakes. But hey, that’s part of the fun, right? Experimenting and finding what works best for you adds a personal touch to your homemade zebra cakes.
In the next section, we’ll step into the kitchen and start the baking process. Get your aprons ready, because it’s about to get deliciously messy!
Step-by-Step Recipe
Creating the perfect zebra cake is akin to crafting a masterpiece. It’s not just about following a recipe; it’s about infusing love and care into every step. So, let’s break down the process into manageable parts, ensuring your cakes are as delightful to make as they are to eat.
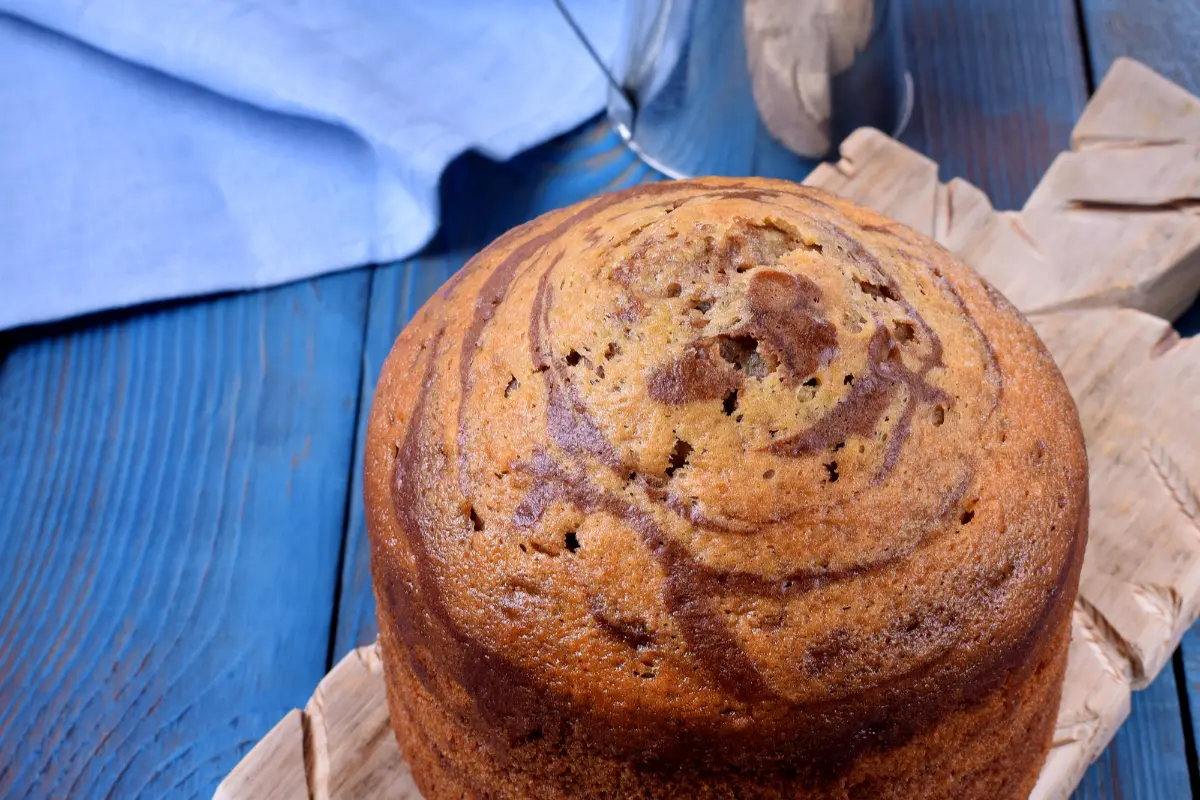
Preparing the Cake Base
The foundation of any good zebra cake is a soft, fluffy base. Here’s how to achieve that perfect texture:
- Mixing the Dry Ingredients: Start by whisking together your flour, baking powder, and a pinch of salt in a large bowl. This not only combines them thoroughly but also aerates the mixture, contributing to a lighter cake.
- Combining Wet and Dry Ingredients: In a separate bowl, blend the melted plant-based butter with sugar and your milk of choice until smooth. Gradually add this to your dry ingredients, stirring until just combined. Remember, overmixing is the enemy of fluffiness!
- Baking Tips for the Perfect Texture: Pour the batter into a lined baking sheet, spreading it evenly. The key here is consistency in thickness, ensuring an even bake. Pop it into a preheated oven and bake until a toothpick comes out clean. Patience is your friend; let the cake cool completely before moving on to the filling.
Making the Filling
The creamy filling is what sets zebra cakes apart. Achieving that perfect consistency is easier than you think:
- Achieving the Creamy Texture: Whip together cold heavy cream (or a vegan alternative), a touch of maple syrup, and vanilla extract until stiff peaks form. This mixture should be light yet stable, ready to add that signature creaminess between the cake layers.
- Vegan Filling Options: For those opting for a plant-based version, fear not. Many store-bought vegan whipped creams can match the texture and taste of traditional cream. Just ensure it’s chilled well before use to maintain structure.
Creating the Coating
The final touch, the chocolate coating, is where the magic happens. Here’s how to get it right:
- Melting and Mixing the Chocolates: Combine white chocolate chips with a bit of hot water, stirring until smooth. This creates a ganache-like consistency, perfect for coating. For the stripes, melt dark chocolate chips separately, ensuring it’s slightly thicker for that iconic zebra pattern.
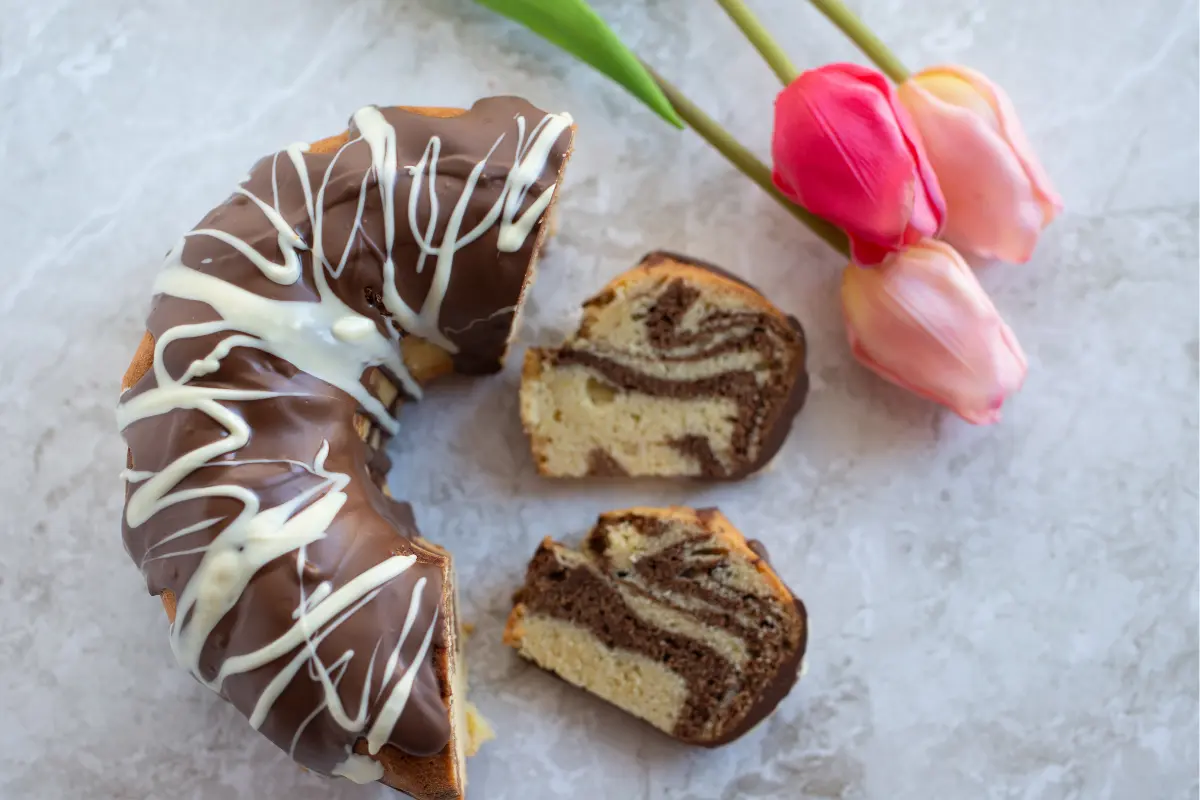
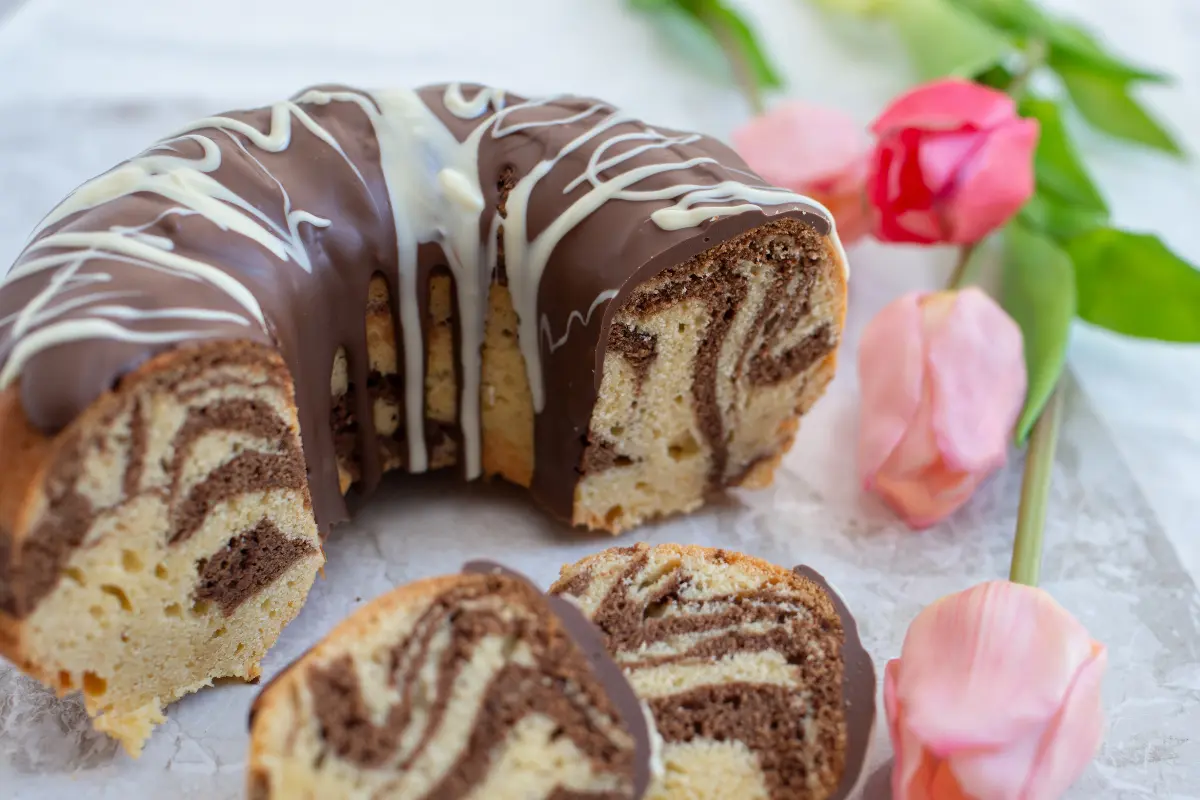
- Achieving the Zebra Stripes Effect: Once your cakes are assembled and filled, pour the white chocolate over each cake, letting it slightly set before adding the dark chocolate stripes. Use a fork or a piping bag for precision, creating those beautiful zebra patterns.
And there you have it, the step-by-step guide to creating zebra cakes that are sure to impress. Remember, baking is as much about the journey as it is about the destination. So, take your time, enjoy the process, and get ready to indulge in some of the best homemade zebra cakes you’ve ever tasted. Stay tuned for the next part, where we’ll dive into assembling and decorating your cakes to perfection.
Assembly and Decoration
Now that we’ve baked our fluffy cake base, whipped up a creamy filling, and prepared our silky chocolate coating, it’s time for the most satisfying part: assembling and decorating our zebra cakes. This is where your cakes start to look like those nostalgic treats, but with a personal touch that makes them uniquely yours.
Assembling the Cakes
- Cutting the Cake: Begin by using a small round cutter (a cookie cutter or even the rim of a glass works wonders) to cut out cake circles. Aim for an even number, as each zebra cake will be a sandwich of two layers.
- Layering with Cream: Place a dollop of your prepared cream on half of the cake circles. Then, gently press another cake circle on top, creating a sandwich. The goal is a generous layer of cream that’s visible at the edges but not oozing out.
- The Coating: Once your cake sandwiches are ready, it’s time for the fun part. Pour the white chocolate coating over each cake, ensuring it covers the top and sides. Let it set for a moment before adding the dark chocolate stripes. For the best zebra effect, drizzle the dark chocolate back and forth in quick, short movements.
Decoration Tips
- Personal Touches: While traditional zebra cakes have a specific look, don’t be afraid to add your own flair. Use sprinkles, edible glitter, or even colored icing to make your cakes stand out.
- Presentation: When serving, think about presentation. Placing each cake on a small doily or a colorful plate can turn these treats into a centerpiece for any occasion.
- Storing and Serving: If you’re not serving your zebra cakes right away, store them in an airtight container in the fridge. They’re best enjoyed chilled, which also helps maintain their shape and texture.
Creating these zebra cakes is more than just following a recipe; it’s about bringing joy and a bit of whimsy into the kitchen. Whether you’re making them for a special occasion or just as a treat for yourself, the process is sure to be as rewarding as the final product.
So there you have it, your very own homemade zebra cakes, ready to dazzle and delight. Remember, baking is an expression of creativity, so feel free to experiment and make each batch uniquely yours. Stay tuned for the next installment, where we’ll share additional tips and tricks to enhance your baking experience even further. Happy baking!
Additional Tips and Tricks
Baking zebra cakes from scratch is an adventure that combines art, science, and a dash of magic. But even the most experienced bakers know there’s always room for improvement. So, let’s sprinkle in some extra tips and tricks to elevate your zebra cake game to the next level.
Baking Tips for Ensuring Even Baking and Moist Cakes
- Even Thickness: When spreading your cake batter, aim for uniform thickness. This ensures that the cake bakes evenly, preventing dry edges or undercooked centers.
- Cooling is Key: Allow your cake to cool completely before cutting into shapes. This patience pays off by making the cake easier to handle and reducing crumbs.
- Oven Thermometer: Ovens can be finicky. Using an oven thermometer ensures that you’re baking at the correct temperature, preventing those dreaded baking mishaps.
Decoration and Presentation Tips for Enhancing Visual Appeal
- Smooth Coating: For a smooth chocolate coating, let the white chocolate sit for a minute after heating. It thickens slightly, allowing for a smoother application over your cakes.
- Creative Stripes: Don’t stress about perfect stripes. Zebra stripes in the wild aren’t uniform, and your cakes don’t need to be either. Embrace the uniqueness of each cake!
- Accessorize: Use edible decorations like gold leaf or edible flowers for special occasions. These small touches can turn your zebra cakes into showstoppers.
Storing Your Zebra Cakes
- Airtight Containers: Store your cakes in an airtight container to keep them fresh. If stacking, use parchment paper between layers to prevent sticking.
- Refrigeration: Keep your zebra cakes in the fridge if not serving immediately. They taste best chilled and this helps maintain their structure.
- Freezing for Later: Yes, you can freeze zebra cakes! Wrap them individually in cling film and then place them in a freezer-safe bag. Thaw in the fridge overnight before serving.
Making Baking a Joyful Experience
- Music and Fun: Turn on your favorite tunes while baking. Dancing in the kitchen isn’t mandatory, but highly recommended!
- Involve Friends and Family: Baking is more fun with company. Invite friends or family members to join in on the fun, making each step a shared experience.
Baking zebra cakes is not just about the delicious end product; it’s about the joy found in the process. Each tip and trick shared here is designed to enhance that experience, making your baking adventure as smooth and enjoyable as possible.
Remember, every baker has their own unique touch. So, take these tips, tweak them to fit your style, and continue to create delightful zebra cakes that are sure to impress. Stay tuned for our next part, where we’ll dive into some frequently asked questions to help you navigate any baking challenges with ease. Happy baking, and may your cakes always be as striped and splendid as a sunny day at the safari!
FAQs
In the world of baking, questions abound, especially when tackling something as whimsically delightful as zebra cakes. Let’s address some of the most common queries that might pop up during your baking journey, ensuring you’re well-equipped to handle anything that comes your way.
Can I Use Store-Bought Icing for This Recipe?
Absolutely! While making your icing allows for customization and can be a fun part of the process, store-bought icing can save time and still yield delicious results. If you’re short on time or just prefer the convenience, go for it. Just remember to choose a quality brand that matches the flavor profile you’re aiming for.
How Long Do Homemade Zebra Cakes Last?
When stored properly in an airtight container, your zebra cakes can last in the fridge for up to 5-7 days. The key is to ensure they’re kept cool and not exposed to air, which can dry them out. If you’ve made a large batch and want to save some for later, you can freeze them for up to 3 months. Just thaw in the fridge overnight before enjoying.
Can I Make the Batter in Advance?
Yes, you can! If you’re planning ahead or want to break the baking process into more manageable steps, making your batter in advance is a great strategy. Store it covered in the fridge for up to a day. When you’re ready to bake, let the batter come to room temperature for about 30 minutes before pouring it into your baking sheet. This ensures your cake bakes evenly and has the perfect texture.
Can I Dip the Cakes in Chocolate Instead of Pouring?
Dipping the cakes in chocolate is definitely an option and can be a fun variation in the decorating process. If you choose to dip, make sure your chocolate coating is smooth and not too thick. You might need to thin it out with a little more hot water or cream. Dipping can get a bit messy, but it’s all part of the fun of baking. Just be gentle to avoid breaking the cakes.
What If My Cakes Come Out Dry?
If your cakes are drier than you’d like, don’t fret. It could be a sign that they were overbaked or the oven temperature was too high. Next time, try reducing the baking time by a few minutes or lowering the oven temperature slightly. For now, a slightly thicker layer of cream filling can help offset the dryness, making your zebra cakes still utterly enjoyable.
Can I Add Flavors to the Cake or Filling?
Certainly! One of the joys of baking is making a recipe your own. Feel free to add extracts like almond, lemon, or even mint to the cake batter or filling for a personalized touch. Just be mindful of balancing flavors so that no single one overwhelms the others. Experimenting with flavors can lead to some fantastic discoveries and make your zebra cakes truly unique.
Baking zebra cakes is a journey filled with sweet rewards and the occasional hiccup. But with every question answered and every challenge overcome, you’re one step closer to becoming a master baker in your own right. Keep those questions coming, and never stop exploring the vast and flavorful world of baking. Stay tuned for our concluding thoughts in the next part, where we’ll wrap up our zebra cake adventure with some final words of encouragement and inspiration.
vegan whipped cream