Dive into the whimsical world of the Princess Cake, a classic Scandinavian delight that has charmed dessert lovers for generations. This iconic cake is not just a treat for the taste buds but a feast for the eyes, with its distinctive green marzipan exterior, layers of airy sponge, sweet raspberry jam, velvety custard, and a crown of whipped cream. Its creation is a labor of love, a testament to the art of baking, and a celebration of tradition. Whether for a special occasion or a cozy afternoon fika, the Princess Cake is a heartwarming symbol of joy and elegance.
Overview of Princess Cake
A Brief History
The Princess Cake, or “Prinsesstårta” in Swedish, holds a special place in the hearts of many, with its roots deeply embedded in Scandinavian culture. This cake’s story began in the early 20th century, crafted by Jenny Åkerström, a teacher to the Swedish princesses. Adored for its exquisite taste and beautiful presentation, it quickly became a beloved tradition, especially during the week of Princess Cake, marking the beginning of autumn.
Why This Recipe Works
Our journey into making the Princess Cake will reveal why this recipe stands out. Through carefully curated steps, we aim to demystify the process, making it accessible for home bakers. The secret lies in the harmony of its components – the tender sponge cake, the rich layers of custard and jam, and the final, elegant marzipan coating, all coming together to create a masterpiece of flavors and textures.
This introduction sets the stage for a delightful baking adventure, inviting you to explore the elegance and charm of the Princess Cake. Stay tuned as we delve deeper into the ingredients and tools you’ll need to bring this enchanting dessert to life.
Preparing the Sponge princess cake
Ah, the sponge cake – the very foundation of our princess cake journey. It’s fluffy, it’s soft, and boy, does it lay the groundwork for a dessert that’s nothing short of royal. Now, you might think, “It’s just a cake, what’s the big deal?” Well, let me tell you, this isn’t just any cake. It’s the bedrock upon which we build our luscious layers of jam, custard, and cream. So, let’s roll up our sleeves and dive into the magical world of sponge cake making, shall we?
Mixing the Batter
First things first, we need to get our batter right. This is where the magic begins. You’ll want to whisk together 4 large eggs with 1 cup of sugar until they’re just begging to turn pale and fluffy. This is not the time to skimp on the whisking; your cake’s fluffiness depends on it!
Next up, sift in ½ cup flour, ½ cup cornstarch (or potato flour if you’re feeling adventurous), 1 teaspoon of baking powder, and a pinch (1/8 teaspoon) of salt right into the mix. Gently fold it all together – and when I say gently, I mean treat it like you would a sleeping kitten.
Baking with Love
Pour your batter into a prepared 9-inch round springform pan. Now, here’s a little tip from me to you: make sure you’ve got that oven preheated to 350°F. Slide your pan into the oven and let it bake for about 27-30 minutes. You’re aiming for that perfect golden hue, and a toothpick that comes out clean as a whistle.
Once done, let it cool slightly in the pan, then on a wire rack until completely cool. Patience is a virtue, especially in baking.
The Art of Layering
Now comes the delicate art of layering. You’ll want to torte your cake into three equal layers. Yes, it requires a steady hand and a serrated knife, but I believe in you. Remember, it’s about creating a base for the luscious fillings to come, so precision is key.
And just like that, you’ve got yourself the base of a princess cake that’s fit for, well, a princess! Next up, we’ll dive into the creamy dreaminess of the vanilla custard filling. Stay tuned, because this cake is starting to shape up into something spectacular.
Making the Vanilla Custard Filling
Now, let’s venture into the heart of our princess cake — the vanilla custard filling. This silky, creamy layer is what dreams are made of. It’s the secret embrace between the sponge layers, offering a sweet, comforting whisper of vanilla with every bite. So, how do we conjure up this magic? Let’s get to it!
The Custard Concoction
Begin by whisking together 1 cup of whole milk, 4 egg yolks, 2 tablespoons of cornstarch, and ¼ cup of granulated sugar in a saucepan. This mixture might seem unassuming at first, but with a bit of heat and constant stirring, it transforms into a thick, luscious custard. Heat it over medium flame and keep that whisk moving. The moment it starts to thicken, remove it from the heat and whisk like the wind. This is your moment to shine, and remember, lumps are not invited to this party.
Once you’ve achieved that glorious, smooth consistency, stir in 1 teaspoon of vanilla extract for that quintessential custard flavor. Then, transfer your masterpiece to a bowl, cover it with plastic wrap (make sure it touches the surface to prevent a skin from forming), and chill in the fridge. You’re looking for it to firm up and become spoonable – a perfect custard cloak for our sponge.
Layering with Love
When it comes to layering our cake, this custard is the middle act in our delicious drama. Spread a generous layer on the first layer of sponge, add a little intrigue with a second sponge on top, and repeat the custard encore. It’s a dance of flavors and textures that sets the stage for the final act – the whipped cream dome that crowns our creation.
And there you have it, the heart of our princess cake ready to unite with its sponge and whipped cream counterparts. But wait, there’s more to this royal tale – the marzipan cloak and the crowning decorations await. Our princess cake is coming together, piece by creamy piece, into a dessert that’s sure to rule any table it graces. Stay tuned for the next chapter, where we’ll wrap our beauty in green and garnish her for the grand reveal.
Assembling the Cake Layers princess cake
The moment has arrived to bring all our components together, transforming them into a masterpiece that’s truly fit for royalty. Assembling a princess cake is a bit like orchestrating a ballet — every element must be in perfect harmony. So, grab your sponge, custard, and whipped cream; it’s time to create something spectacular.
Creating the Perfect Base
Start with the bottom layer of your sponge cake, placing it on a plate or cake board with the utmost care. This is the foundation of our creation, so make sure it’s set just right.
Spreading the Joy
Next, it’s time for a layer of raspberry jam. Spread it evenly over the sponge, covering every inch. This adds a delightful zing and complements the sweetness of the custard and cream to come.
The Custard Layer
Now, spoon half of your chilled vanilla custard over the jam. Spread it gently, making sure it reaches the edges but doesn’t spill over. This is the moment when our cake starts to get its luxurious character.
Building Up
Place the second sponge cake layer on top of the custard. Press down lightly to ensure it’s secure. Now, repeat the custard step, spreading the remainder of your vanilla custard over this second layer.
The Crowning Glory
It’s time for the whipped cream. Pile it high and smooth it into a dome shape with a large spatula. This whipped cream dome is not just a topping; it’s the signature of a traditional princess cake, giving it that distinctive, elegant profile.
The Final Layer
Add the last layer of sponge, pressing down to meld all the layers into one cohesive, delicious whole. This last sponge layer acts as a seal, locking in the flavors and setting the stage for the marzipan covering.
And just like that, our princess cake is assembled, layer by creamy layer. It stands tall, proud, and ready for its final dress-up in marzipan. The anticipation is building, much like the layers of this exquisite cake, each adding its own flavor and texture to the symphony that is the princess cake. Stay tuned for the grand finale, where we’ll cloak our creation in green marzipan and add those final, decorative touches.
cake boasts a rich history, tracing back to the early 20th century in Sweden
Decorating with Marzipan and Final Touches
We’ve baked, we’ve layered, and now, dear readers, we arrive at the crowning moment of our princess cake saga: the decoration phase. This is where our cake transforms from a mere dessert into a regal spectacle, a true testament to the art of baking. So, let’s don the marzipan, shall we?
The Marzipan Mantle
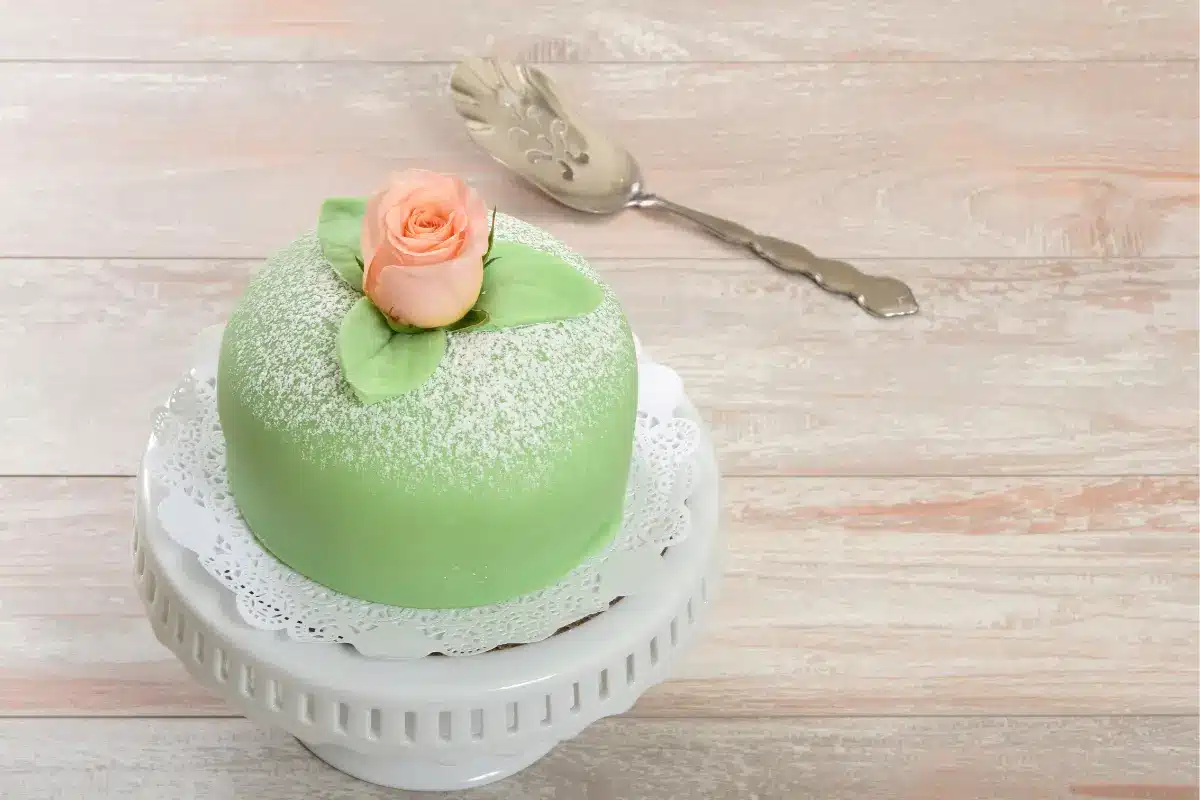
To begin, take your 1 lb. of prepared marzipan. This is the cloak that will drape our cake in elegance. Color it with a few drops of leaf green food color until you achieve that classic, vibrant green hue associated with traditional princess cakes. Knead the color evenly through the marzipan, then roll it out on a surface dusted with powdered sugar. You’re aiming for a circle large enough to cover the entire cake, including its domed top.
Dressing the Cake
With the utmost care, lift the marzipan over your cake, draping it gently over the whipped cream dome. Smooth it out with your hands, encouraging it to take the shape of the cake beneath. Trim any excess from the bottom, and for that picture-perfect finish, tuck the edges underneath with a butter knife.
The Floral Finale
Now, for the pièce de résistance: the decorations. With the leftover marzipan, tint a small portion a darker shade of green and roll it out. Cut out little star-shaped leaves. These will serve as the base for our marzipan roses, adding a touch of sophistication.
If you’re not up for crafting marzipan roses, no worries! Ready-made rose icing decorations are a fabulous alternative. Give them a light brush with a mixture of pink food coloring dissolved in clear extract to match the cake’s color palette.
Placing the Roses
Attach the star-shaped leaves to the bottom of your roses with a dab of icing or corn syrup. Then, place the roses atop the cake, securing them with a little more icing. This floral arrangement on top of your cake is not just a decoration; it symbolizes the beauty and grace of the dessert itself.
The Final Dusting
For a finishing touch, a light dusting of powdered sugar over the marzipan gives the cake an ethereal, almost magical appearance. It’s like the first delicate frost of winter, adding a layer of subtle elegance.
And there you have it, folks — a princess cake that’s as beautiful to behold as it is delicious to devour. Through layers of sponge, custard, and cream, encased in a vibrant marzipan cloak and crowned with delicate roses, we’ve created a dessert that’s fit for any celebration. From the first slice to the last crumb, this cake promises to be a memorable part of your culinary adventures. So, go ahead, take a bow. You’ve earned it.
What Makes a Princess Cake So Special
FAQs about princess cake
In our journey through the enchanted world of princess cake, we’ve whisked, layered, and adorned our way to creating a dessert that’s as regal as it is delightful. Along the way, you might have found yourself pondering some questions about this exquisite cake. Fear not, for I’ve gathered the most common queries and am here to unveil the mysteries that lie within this Scandinavian confection.
What Makes a Princess Cake So Special?
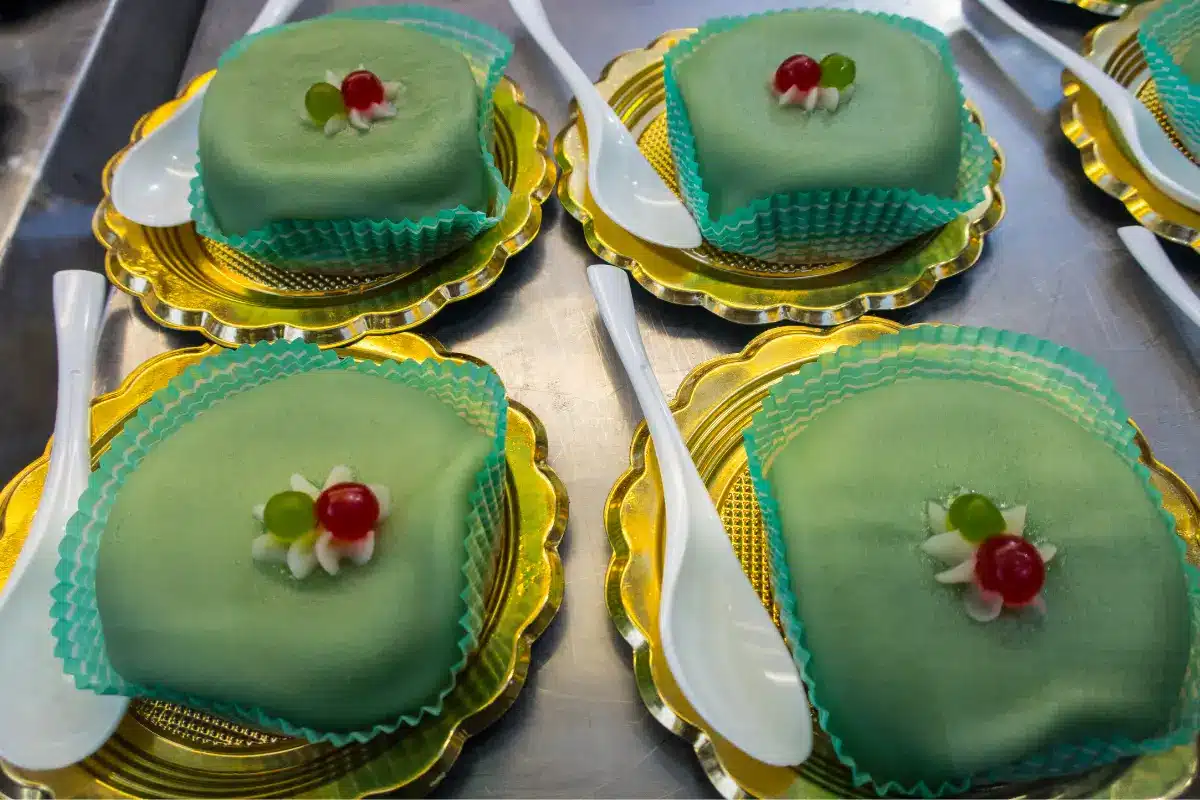
The princess cake, with its layers of sponge, jam, custard, whipped cream, and a marzipan cloak, is a testament to the art of baking. Its unique combination of flavors and textures, coupled with the traditional green marzipan covering, makes it a standout dessert for any celebration.
Can I Make My Princess Cake Ahead of Time?
Absolutely! In fact, assembling the cake a day in advance allows the flavors to meld beautifully. Just be sure to keep it refrigerated until it’s time to serve. Remember, the fresher, the better, especially when it comes to the whipped cream and marzipan elements.
How Do I Store Leftover Princess Cake?
Leftovers (though unlikely!) should be stored in the refrigerator, covered lightly with plastic wrap or in an airtight container. This will help maintain its freshness for up to 3 days. Just keep in mind, the sooner you enjoy it, the better the taste and texture will be.
Can I Customize the Flavors of My Princess Cake?
Of course! While the traditional princess cake features raspberry jam and vanilla custard, feel free to get creative. Strawberry jam, lemon curd, or even a chocolate ganache can add a delightful twist to your cake. The beauty of baking is in making it your own.
Is It Necessary to Use Marzipan? Can I Use Fondant Instead?
Traditionally, princess cake is covered with marzipan, which gives it that distinctive almond flavor and the classic green hue. However, if you’re not a fan of marzipan, fondant is a perfectly acceptable substitute. Just keep in mind, the taste and texture will differ from the classic version.
Making Marzipan Roses Seems Daunting. Any Tips?
Making marzipan roses is simpler than it seems! Start with small balls of marzipan, flatten them into petals, and layer thm around each other. For beginners, ready-made icing decorations are a wonderful alternative, saving time while still achieving that elegant finish.