In the spirit of the festive season, our culinary journey takes us on a delightful exploration of one of the most cherished holiday treats: peppermint candy. This article, crafted with the utmost care, will guide you through the enchanting world of making peppermint candy from scratch. From the rich history that paints a nostalgic picture of holiday traditions to the practical tips that ensure your candy making is a resounding success, we’ve got it all covered. So, let’s embark on this sweet adventure, ensuring that your holiday season is as festive and flavorful as it can be.
Peppermint Candy
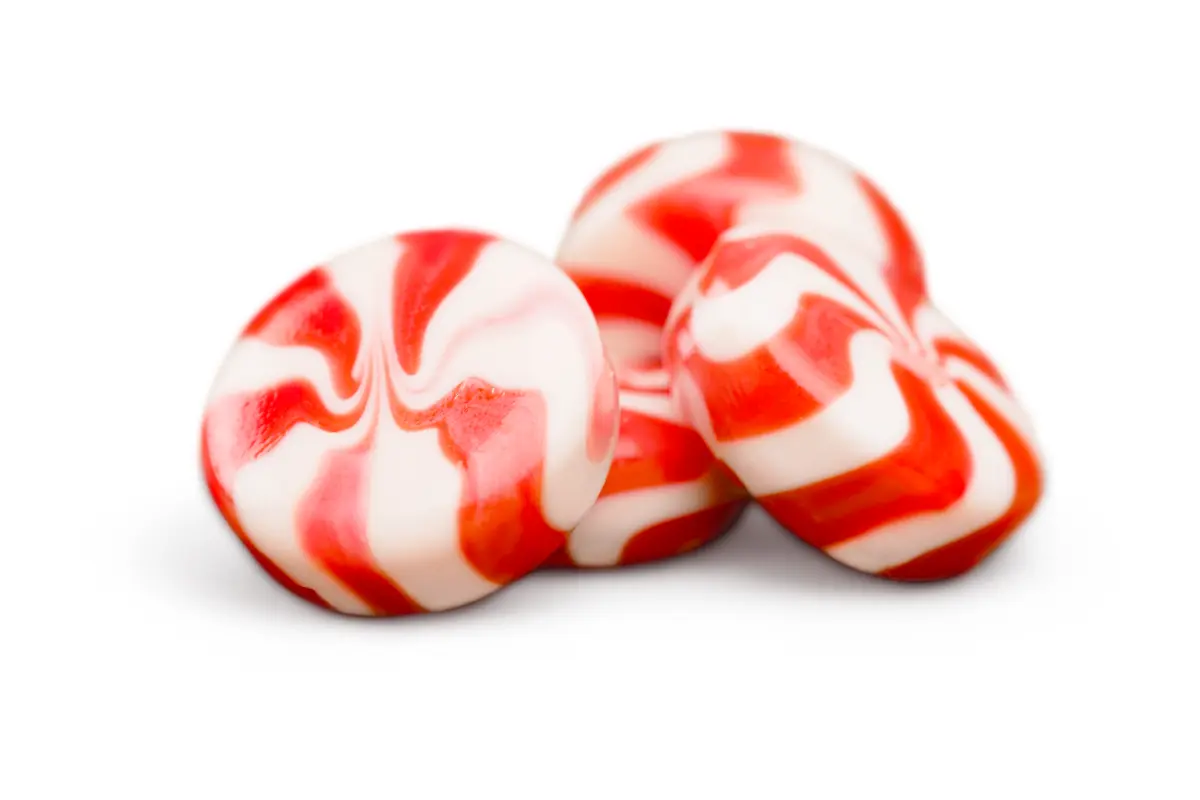
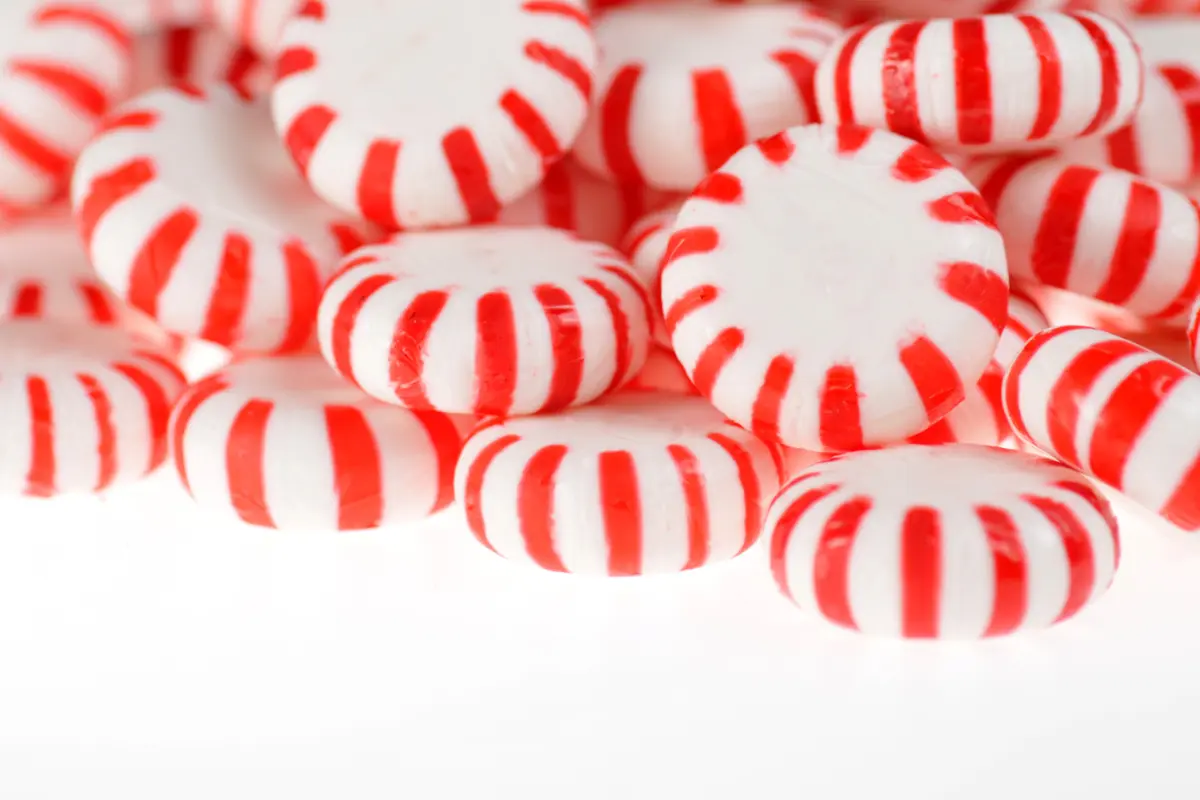
Ah, peppermint candy – the quintessential symbol of holiday cheer. Who can resist the invigorating aroma of peppermint that seems to dance through the air during this festive season? It’s not just a candy; it’s a piece of holiday tradition, wrapped in swirls of red and white, promising joy and nostalgia in every bite.
The History of Peppermint Candy
Diving into the annals of history, peppermint candy holds a special place in the heart of holiday traditions. It’s believed that peppermint candy canes first made their appearance over 350 years ago, not as a treat, but as a decoration for Christmas trees. Fast forward to today, and these candies have become a global symbol of Christmas cheer. They’re not just for decoration anymore; they’re a festive treat that delights taste buds around the world.
Why Peppermint Candy is a Holiday Favorite
But what makes peppermint candy such a holiday favorite, you ask? Well, it’s a combination of its refreshing taste and the way it evokes cherished memories of holiday seasons past. There’s something about that cool, crisp flavor that instantly transports us to a winter wonderland, even if we’re celebrating somewhere much warmer. Plus, peppermint has been associated with numerous health benefits, including aiding digestion and boosting energy levels – just what we need during the busy holiday season!
Now, with our hearts full of anticipation and perhaps a bit of that holiday magic, let’s prepare to create our own peppermint candy. With a dash of creativity and a sprinkle of love, we’ll turn simple ingredients into extraordinary holiday treats. So, gather your ingredients, and let’s make this holiday season the most delicious one yet.
Ingredients and Tools Required
Before we dive into the magical process of making peppermint candy, let’s make sure we have everything we need. A good chef is always prepared, after all! Below is a straightforward list of ingredients and tools that will transform your kitchen into a candy-making workshop.
List of Ingredients for Peppermint Candy
- 2 cups of sugar
- 1/2 cup of light corn syrup
- 1/2 cup of water
- 1/4 teaspoon of cream of tartar
- 1-2 teaspoons of peppermint extract (depending on how minty you like it)
- Red food coloring (optional, for that classic peppermint candy look)
Essential Tools for Making Peppermint Candy
- Candy thermometer: Essential for making sure your candy mixture reaches the perfect temperature.
- Silicone baking mat or parchment paper: To pour your candy mixture on and let it cool.
- Heavy-bottomed saucepan: For cooking your candy mixture evenly without burning.
- Wooden spoon or silicone spatula: To stir your candy mixture as it cooks.
- Butter or cooking spray: To grease your silicone mat or parchment paper, ensuring your candy doesn’t stick.
- Sharp knife or pizza cutter: For slicing your candy into bite-sized pieces once it’s set.
Having the right tools and ingredients at your disposal will not only make the candy-making process smoother but will also enhance your overall experience. Remember, making peppermint candy is more than just following a recipe; it’s about creating memories and indulging in the joy of the season. So, with our ingredients ready and our tools at hand, we’re all set to move on to the enchanting process of making peppermint candy. Stay tuned for the step-by-step guide in the next part, where the real magic begins!
Step-by-Step Peppermint Candy Recipe
With our ingredients and tools lined up, it’s time to dive into the heart of candy making. Follow these steps closely, and you’ll be on your way to creating peppermint candy that not only tastes delightful but also spreads holiday cheer.
Preparing Your Ingredients
First things first, let’s get our ingredients ready. Measure everything out before you begin. This will make the cooking process seamless and enjoyable. Remember, precision is key in candy making, so be as accurate as possible with your measurements.
Cooking Process
- Combine Ingredients: In your heavy-bottomed saucepan, mix the sugar, corn syrup, water, and cream of tartar. Stir the mixture over medium heat until the sugar dissolves completely. This is where your wooden spoon or silicone spatula comes in handy.
- Monitor the Temperature: Once the sugar is dissolved, clip your candy thermometer to the side of the saucepan. Make sure it’s not touching the bottom for an accurate reading. You’ll want to heat the mixture to the hard-crack stage, which is about 300°F (149°C). It’s crucial not to stir the mixture during this phase; just let the heat work its magic.
- Add Peppermint Extract: As soon as your mixture reaches the hard-crack stage, remove the saucepan from the heat. Carefully stir in the peppermint extract. This is where your candy starts to get its iconic flavor, so feel the excitement!
- Coloring Your Candy: If you’re opting for the classic red stripe, now’s the time to add a few drops of red food coloring. Stir gently to create beautiful swirls or mix thoroughly for a uniform color.
Cooling and Setting
- Prepare for Pouring: Quickly grease your silicone mat or parchment paper with butter or cooking spray. Then, pour the hot candy mixture onto the surface. If you’re aiming for thinner candies, use a greased spatula to spread the mixture to your desired thickness.
- Creating the Peppermint Stripes: For those lovely red stripes, use a toothpick to swirl in the red food coloring if you haven’t already mixed it in. This step requires a bit of artistry, so have fun with it!
- Let it Set: Allow your candy to cool and harden at room temperature. This usually takes about 1 hour. Resist the temptation to touch it; patience is a virtue here.
- Breaking it Up: Once your candy is set, break it into pieces using a sharp knife or a pizza cutter. If you’ve made a thin sheet, you can also have fun breaking it into shards by hand (gently, of course).
Voila! You’ve now made your very own peppermint candy. Each piece is a testament to your dedication and holiday spirit. But our journey doesn’t end here. Next, we’ll explore how to add some twists to your peppermint candies and make this holiday treat uniquely yours. Stay tuned for creative variations that will tantalize your taste buds and impress your loved ones.
Variations of Peppermint Candy
Now that you’ve mastered the classic peppermint candy recipe, why not sprinkle a little extra magic into your creations? These variations offer delightful twists that can cater to different tastes and occasions, making your homemade candies truly special.
Chocolate-Dipped Peppermint Candy
For those who believe everything is better with chocolate, this variation is a dream come true. Once your peppermint candies have cooled and been broken into pieces:
- Melt Your Chocolate: Choose high-quality dark, milk, or white chocolate. Melt it in a double boiler or in short bursts in the microwave, stirring frequently to ensure it’s smooth.
- Dip Away: Dip each peppermint candy piece halfway into the melted chocolate, ensuring a nice, even coating. You can also drizzle the chocolate over the candies for an artistic effect.
- Set to Cool: Lay the chocolate-dipped candies on a parchment paper-lined tray. If you’re feeling extra festive, sprinkle some crushed peppermint pieces on top before the chocolate sets.
- Cooling: Allow the chocolate to harden at room temperature or pop the tray in the fridge for a quicker set.
This combination of rich chocolate and crisp peppermint creates a symphony of flavors that’s hard to resist. It’s perfect for gifting or serving at holiday parties.
Vegan Peppermint Candy Options
Catering to dietary preferences or restrictions doesn’t mean compromising on taste. For a vegan version of peppermint candies:
- Substitute Ingredients: Use organic cane sugar (to ensure it’s unrefined) and swap the regular corn syrup for a vegan-friendly brand.
- Vegan Chocolate: If dipping in chocolate, opt for a vegan chocolate variety. There are many delicious options available that melt just as beautifully as their non-vegan counterparts.
- Check Your Extracts: Ensure that your peppermint extract is vegan. Most are, but it’s always best to check.
Creating vegan peppermint candies shows thoughtfulness and inclusivity, making sure everyone can enjoy a piece of holiday joy.
By exploring these variations, you can add a personal touch to your homemade peppermint candies. Whether it’s the luxurious allure of chocolate or the thoughtful consideration of a vegan option, these twists ensure that your candies will be a hit. In our next segment, we’ll tackle some common troubleshooting tips to help you perfect your candy-making skills. Stay tuned for solutions to common peppermint candy-making challenges, ensuring your sweet endeavors are always a success.
Troubleshooting Common Issues
Even the most experienced candy makers can run into a few hiccups along the way. But fear not! Here, we’ll tackle some common issues that might arise when making peppermint candy, offering solutions to keep your holiday candy-making merry and bright.
- Candy is Too Soft: If your candy hasn’t hardened to the expected crunchy texture, it likely didn’t reach the correct temperature. Make sure your candy thermometer is accurate and that the mixture reaches the hard-crack stage (300°F or 149°C).
- Candy is Too Hard: On the flip side, if your candy is too hard or starts to crystallize, it may have been cooked too long or stirred too frequently once it reached the hard-crack stage. Keep a vigilant eye on the temperature, and remember, no stirring after it dissolves!
- Candy Sticks to the Surface: Forgot to grease your silicone mat or parchment paper? This could lead to your candy masterpiece sticking. If you find yourself in this sticky situation, gently heat the bottom of the mat or paper to loosen the candy.
- Uneven Coloring: Achieving that perfect swirl or the ideal shade can be tricky. If the coloring isn’t what you expected, experiment with adding the food coloring at different stages or using a toothpick to swirl the color more precisely next time.
- Flavor is Too Weak or Too Strong: The intensity of the peppermint flavor can make or break your candy. If it’s too strong, reduce the amount of peppermint extract next time. If it’s too mild, don’t hesitate to add a bit more, keeping in mind that the flavor intensifies as the candy cools.
By anticipating these potential pitfalls and knowing how to address them, you’re well-equipped to navigate the candy-making process with confidence. Remember, every batch of peppermint candy is a learning experience and an opportunity to refine your skills. So, keep these troubleshooting tips in mind, and your next batch will be even closer to perfection.
Storing and Enjoying Peppermint Candy
After mastering the art of making peppermint candy, ensuring it stays fresh and delightful is the next step. Proper storage not only preserves the flavor and texture but also extends the joy of your homemade treats. Plus, we’ll explore some creative ways to enjoy your peppermint candies, making every bite a celebration of the holiday spirit.
Best Practices for Storing Peppermint Candy
- Cool Completely: Before storing, ensure your candies are completely cool. This prevents moisture buildup, which could lead to them sticking together or becoming too soft.
- Airtight Containers: Store your peppermint candy in airtight containers. These containers keep out moisture and other contaminants, ensuring your candy remains crisp and delicious.
- Separate Layers with Parchment Paper: If you’re stacking your candies, place a layer of parchment paper between each layer. This prevents them from sticking to each other, maintaining their individual integrity.
- Keep in a Cool, Dry Place: Heat and humidity are candy’s worst enemies. Store your container in a cool, dry place away from direct sunlight, which can cause your candies to melt or become sticky.
- Freezing for Longevity: For long-term storage, peppermint candies can be frozen. Ensure they’re wrapped tightly in plastic wrap and then placed in an airtight container or zip-lock bag. When you’re ready to enjoy them, let them thaw at room temperature.
Creative Ways to Enjoy Peppermint Candy
Peppermint candy is delightful on its own, but it also adds a festive flair to various holiday treats. Here are some imaginative ways to incorporate your homemade candies into the holiday cheer:
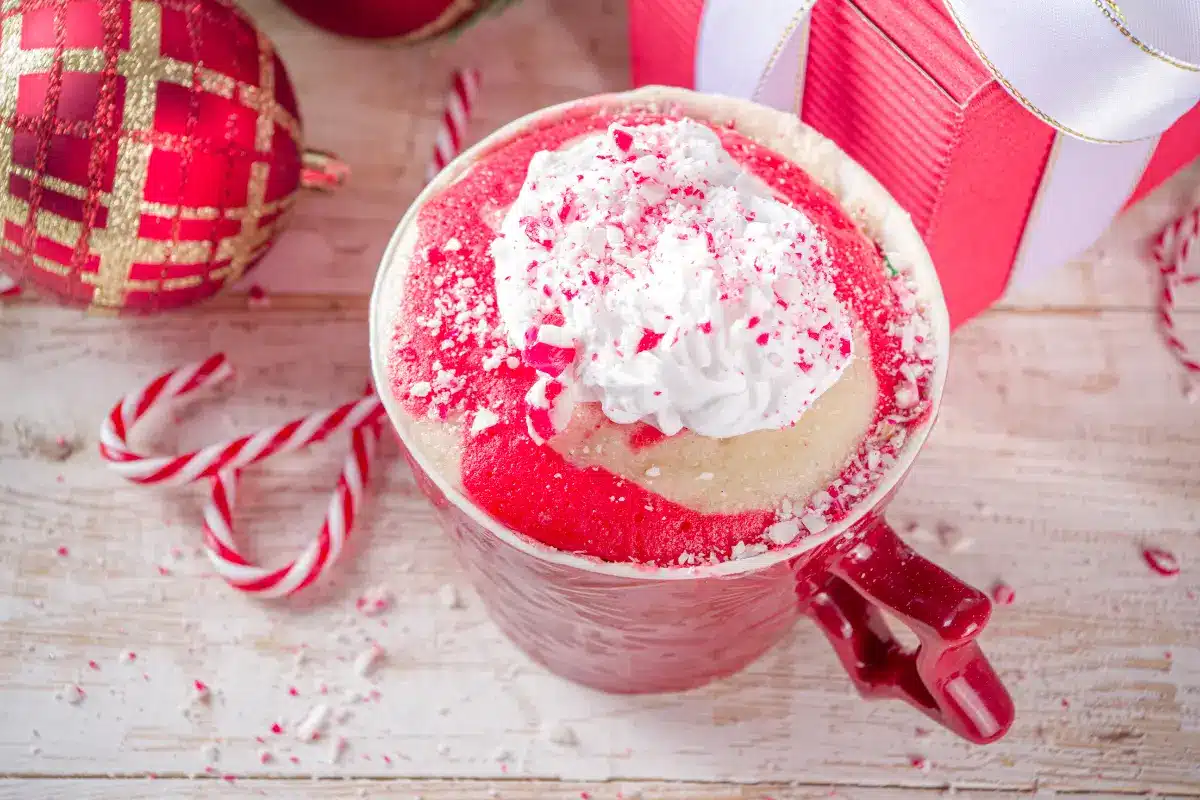
- Peppermint Hot Chocolate: Crush a few candies and sprinkle them over your hot chocolate for a minty twist. It’s the perfect cozy beverage for chilly winter evenings.
- Holiday Baking: Crushed peppermint candy can be a vibrant addition to cookies, brownies, or even cake batter, adding a festive crunch and flavor.
- DIY Holiday Gifts: Package your homemade peppermint candies in decorative bags or jars, tied with a ribbon. It’s a personal and thoughtful gift that’s sure to spread holiday cheer.
- Decorating Gingerbread Houses: Use your peppermint candies as decorations for gingerbread houses. Their bright colors and shapes add a whimsical touch to your edible creations.
By following these storage tips and exploring creative ways to enjoy your peppermint candy, you’ll not only extend the lifespan of your treats but also enhance your holiday celebrations. Whether sharing with loved ones or savoring them yourself, these peppermint candies are a testament to the joy and warmth of the season.
National Center for Biotechnology Information (NCBI)
FAQs
In the realm of candy making, especially with something as iconic as peppermint candy, questions abound. Here, we address some of the most commonly asked queries, ensuring your candy-making journey is as smooth as a freshly glazed peppermint.
Can I use peppermint extract instead of peppermint oil?
- Yes, peppermint extract can be used in place of peppermint oil. However, it’s important to note that the extract is less concentrated than the oil. This means you might need to use a bit more to achieve the desired peppermint punch. Start with the recommended amount and adjust according to taste, keeping in mind the balance of flavor.
How long does homemade peppermint candy last?
- When stored properly in an airtight container and kept in a cool, dry place, homemade peppermint candy can last for several weeks. If you opt to freeze it, your candy can extend its joy up to several months. Just be sure to let it thaw at room temperature before indulging.
Is it possible to make peppermint candy without a candy thermometer?
- While a candy thermometer is highly recommended for precision, you can use the cold water test as an alternative. Drop a small amount of the hot candy mixture into a bowl of cold water. If it forms hard, brittle threads that crack easily, it has reached the hard-crack stage. This method requires practice and a keen sense for timing, so for beginners, a thermometer might be the safer bet.
Why did my peppermint candy turn out sticky?
- Stickiness usually results from humidity or not reaching the hard-crack stage during cooking. Ensure your candy mixture reaches 300°F (149°C), and store your candies in an airtight container to keep out moisture. If you’re in a particularly humid environment, consider using a dehumidifier in your kitchen during the candy-making process.
Can I add colors other than red to my peppermint candy?
- Absolutely! While red is traditional for peppermint candy, feel free to experiment with other colors to match different themes or occasions. Green can offer a festive alternative, or even a mix of colors for a rainbow effect. The sky’s the limit when it comes to customizing your candies.