Halloween is the season when creativity collides with flavor—where everyday desserts get spooky makeovers and even the simplest recipes can become party showstoppers. If you’re looking for something festive, fun, and ridiculously easy, these Marshmallow Rice Krispies (Bubbles) Halloween Brains are your answer.
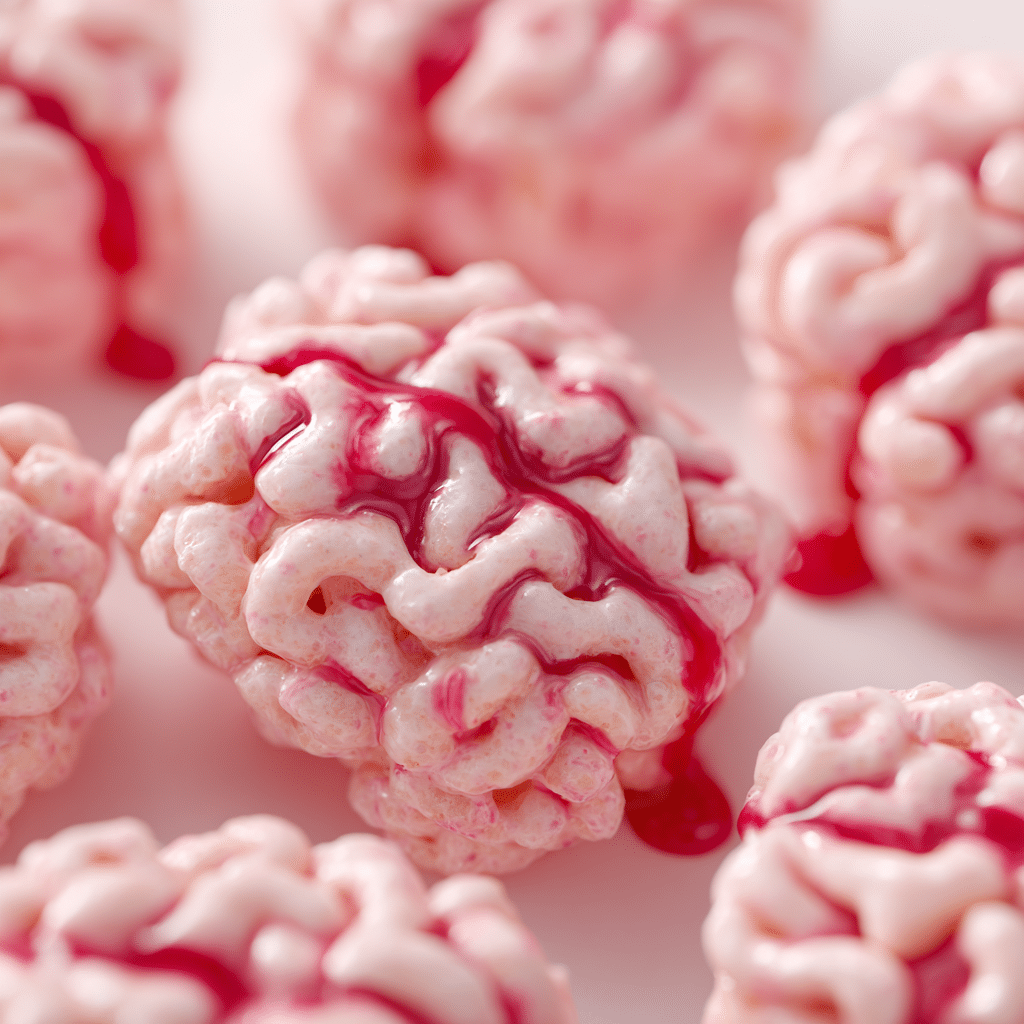
Chewy, gooey Rice Krispies treats are shaped into brain-like “bubbles” and topped with red icing or gel for a creepy finishing touch. They’re kid-approved, crowd-pleasing, and perfect for trick-or-treat tables, Halloween bake sales, or themed movie nights.
With just a few ingredients and a little imagination, you can whip up these edible brains that are as spooky as they are delicious.
Why You’ll Love These Halloween Brain Treats
-
Easy to make – Just 20 minutes and a handful of ingredients.
-
Kid-friendly – Perfect for little helpers in the kitchen.
-
Budget-friendly – Uses pantry staples like marshmallows, butter, and cereal.
-
Customizable – Add food coloring, candy, or sprinkles for extra flair.
-
Creepy but fun – Just the right amount of spooky without being too scary.
Whether you’re planning a haunted house party or need a last-minute Halloween snack, these gooey “brains” are sure to turn heads.
Ingredients You’ll Need
This recipe sticks to the classic Rice Krispies treat formula, with a few gory extras for the Halloween twist.
For the Rice Krispies Brains
-
6 cups Rice Krispies cereal (or puffed rice cereal)
-
1 bag (10 oz / 280g) mini marshmallows
-
3 tbsp unsalted butter
-
1/2 tsp vanilla extract
-
Red or pink food coloring (optional, for brain effect)
For the Decoration
-
Red decorating gel, strawberry syrup, or melted red candy melts (for “blood”)
-
Optional: black licorice strings or gummy worms (for extra creep factor)
How to Make Marshmallow Rice Krispies Halloween Brains
Let’s walk through the simple steps to transform ordinary Rice Krispies treats into brains worthy of any spooky party.
1. Melt the Butter and Marshmallows
In a large pot, melt the butter over low heat. Add the marshmallows and stir until completely melted and smooth. Remove from heat and stir in vanilla.
Tip: Add a few drops of pink or red food coloring at this stage for a brain-like hue.
2. Mix in the Cereal
Quickly stir in the Rice Krispies cereal until evenly coated with the marshmallow mixture. Work fast before it sets.
3. Shape the Brains
Grease your hands lightly with butter or cooking spray. Scoop a handful of the mixture and form into oval or round “brain” shapes, about the size of a tennis ball.
Place each on a parchment-lined baking sheet.
4. Add the Details
Use a butter knife, spoon handle, or your fingers to create an indent down the middle of each ball, mimicking the groove of a brain. Press lightly to make wavy patterns on the sides.
5. Decorate with “Blood”
Drizzle red decorating gel, melted candy melts, or syrup over the grooves to create a gory brain effect.
For an extra scare factor, stick gummy worms coming out of the sides or wrap licorice strings across like veins.
Serving Suggestions
These edible brains are versatile enough for many Halloween occasions:
-
Party platter centerpiece – Pile them on a black tray with fake cobwebs and plastic spiders.
-
Individual treats – Wrap each brain in clear plastic wrap and tie with orange or black ribbon for take-home favors.
-
Classroom snacks – Make smaller, golf-ball-sized brains for kid-friendly portions.
-
Movie night munchies – Pair with popcorn and cider for a fun themed spread.
Make-Ahead and Storage Tips
-
Room Temperature: Store in an airtight container at room temp for up to 3 days.
-
Refrigerator: Keeps up to 1 week, but may harden slightly.
-
Freezer: Not recommended, as freezing alters the chewy texture.
To refresh slightly hardened treats, microwave for 5–10 seconds.
Fun Variations
Want to get even creepier (or tastier)? Try these variations:
1. Candy-Stuffed Brains
Insert a surprise candy center (like M&Ms or gummy worms) before shaping the brains.
2. Chocolate Brains
Stir in 1/2 cup of melted white chocolate with the marshmallow mix for extra richness. Tint pink for added realism.
3. Brain Cupcakes
Place small brain bubbles on top of frosted cupcakes for a two-in-one Halloween dessert.
4. Monster Brains
Use green food coloring in the marshmallow mixture for zombie-inspired brains.
Tips for Perfect Brain Treats
-
Grease your hands often. Marshmallow mixture is sticky—cooking spray or butter helps.
-
Work quickly. Shape while the mixture is still warm and pliable.
-
Add details with tools. A butter knife, skewer, or spoon handle works great for grooves.
-
Keep sizes consistent. Use a cookie scoop for uniform portions.
-
Go wild with toppings. The scarier, the better—Halloween is the time to play.
Frequently Asked Questions
Can I use large marshmallows instead of mini?
Yes, use about 40 large marshmallows. They just take longer to melt.
Can I make these gluten-free?
Absolutely—just make sure your cereal is certified gluten-free.
Do I need food coloring?
No, but pink or red coloring makes the brains more realistic.
Can I double the recipe?
Yes! Just use a bigger pot, since the mixture is sticky and expands.