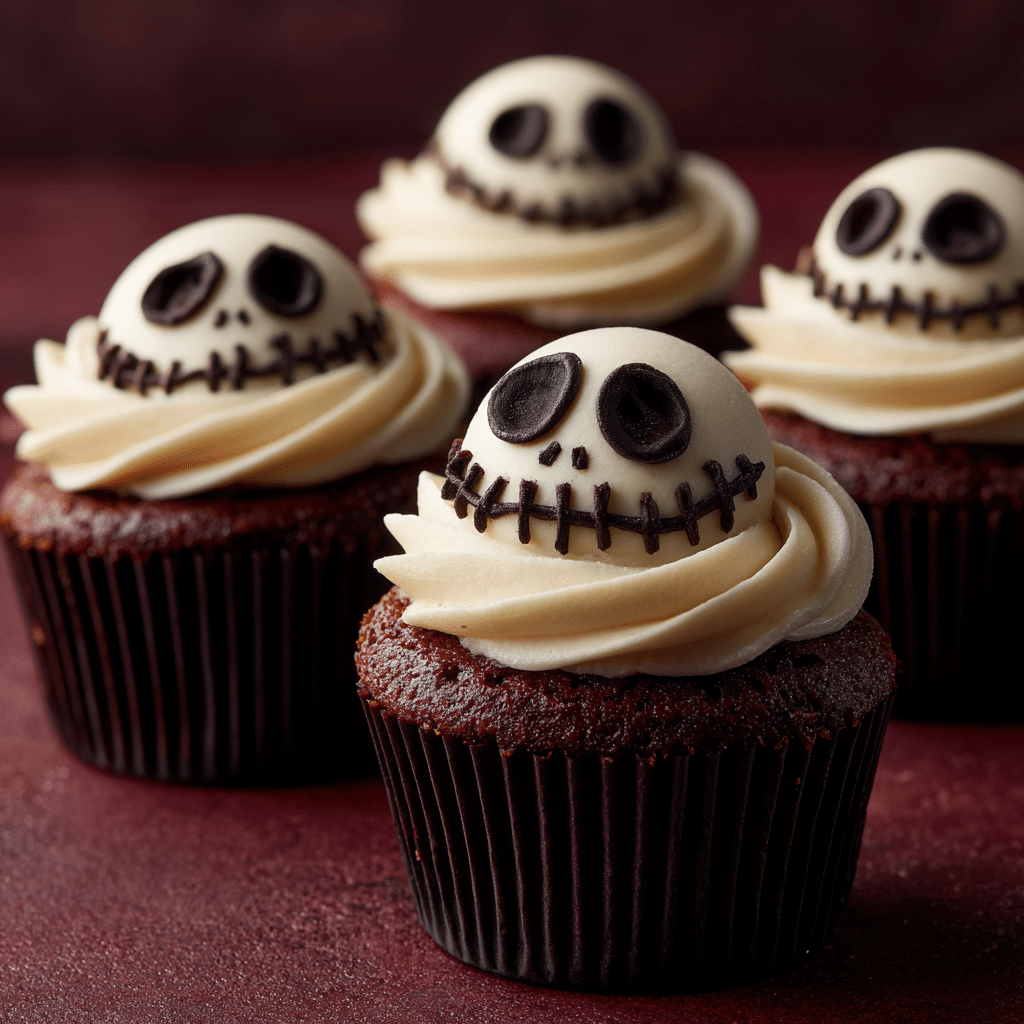
Halloween is the one night of the year when spooky fun, creativity, and indulgence collide—and what better way to celebrate than with a batch of Creepy Halloween Skull Cupcakes? These cupcakes aren’t just delicious; they double as edible works of art that will wow kids and adults alike at parties, bake sales, or family nights in. Imagine moist, chocolatey cupcakes topped with eerie skull decorations and finished with a ghoulish flair. They’re festive, flavorful, and frighteningly fun to make.
The inspiration for these cupcakes comes from the joy of baking as part of Halloween traditions. Growing up, many of us remember gathering around the kitchen, carving pumpkins, and munching on sweet treats while spooky movies played in the background. These skull cupcakes are designed to bring back that sense of playful fright while adding a creative twist. They combine classic baking with a touch of decorating magic, perfect for anyone who wants to be the star of the Halloween dessert table.
Why You’ll Love These Halloween Skull Cupcakes
-
Show-stopping presentation: With edible skull toppers, these cupcakes look like they’ve been conjured from a haunted kitchen.
-
Easy to customize: Use store-bought decorations or make your own skulls with candy melts or fondant.
-
Kid-friendly fun: Decorating cupcakes is an activity the whole family can enjoy, especially for Halloween parties.
-
Rich, decadent flavor: The chocolate cupcakes are moist and indulgent, pairing perfectly with creamy frosting.
Ingredients
For the Chocolate Cupcakes
-
1 cup all-purpose flour
-
1 cup granulated sugar
-
½ cup unsweetened cocoa powder
-
1 tsp baking powder
-
½ tsp baking soda
-
½ tsp salt
-
1 large egg
-
½ cup buttermilk
-
½ cup vegetable oil
-
1 tsp vanilla extract
-
½ cup hot water (or hot coffee for deeper flavor)
For the Buttercream Frosting
-
1 cup unsalted butter, softened
-
3 ½ cups powdered sugar
-
2 tbsp heavy cream (or milk)
-
1 tsp vanilla extract
-
Black food coloring (gel recommended)
For the Skull Decorations
-
White candy melts or fondant
-
Skull-shaped silicone mold (or premade candy skulls)
-
Edible black gel, edible paint, or melted dark chocolate for details
Step-by-Step Instructions
1. Make the Cupcakes
-
Preheat your oven to 350°F (175°C) and line a cupcake pan with festive Halloween liners.
-
In a large bowl, whisk together flour, sugar, cocoa powder, baking powder, baking soda, and salt.
-
Add egg, buttermilk, oil, and vanilla. Mix until smooth.
-
Carefully stir in the hot water (or coffee) until fully incorporated—the batter will be thin, but that’s what makes the cupcakes moist.
-
Divide batter evenly among liners, filling about ⅔ full.
-
Bake for 18–20 minutes, or until a toothpick inserted in the center comes out clean.
-
Cool completely on a wire rack before decorating.
2. Make the Frosting
-
In a large mixing bowl, beat the softened butter until light and fluffy.
-
Gradually add powdered sugar, one cup at a time, mixing well after each addition.
-
Add vanilla and heavy cream, beating until smooth and creamy.
-
Add black food coloring, a little at a time, until the frosting reaches a rich, spooky black shade.
3. Create the Skull Toppers
-
Using Candy Melts: Melt white candy melts according to package instructions. Pour into a skull mold, tap to remove air bubbles, and let set until firm.
-
Using Fondant: Roll out white fondant and press into a skull mold. Remove carefully and let dry.
-
Adding Details: Use edible black gel or melted chocolate to draw eye sockets, teeth, and shadows for a realistic creepy effect.
Shortcut: Buy pre-made skull candies or toppers at baking supply stores if you’re short on time.
4. Assemble the Cupcakes
-
Transfer frosting to a piping bag fitted with a round or star tip.
-
Pipe generous swirls of black frosting onto each cooled cupcake.
-
Gently press a candy skull into the frosting.
-
Add extra spooky touches: edible glitter, candy bones, gummy worms, or a drizzle of red gel to mimic “blood.”
Tips for Perfect Halloween Skull Cupcakes
-
Invest in good food coloring: Gel-based colors give rich results without affecting frosting texture.
-
Make skulls ahead of time: Skull toppers can be prepared days before the event and stored in a cool, dry place.
-
Chill the cupcakes before serving: This helps the frosting hold its shape during Halloween parties.
-
Use hot coffee in the batter: It enhances the chocolate flavor without making the cupcakes taste like coffee.
Creative Variations
Bloody Skull Cupcakes
Add a drizzle of red gel icing over the skulls for a dramatic, eerie “blood-splattered” look.
Graveyard Cupcakes
Swap the skull toppers for a combination of skulls and cookie “tombstones” for a mini graveyard scene.
Glowing Skull Effect
Brush the skulls lightly with edible pearl dust or glow-in-the-dark style edible paints for a supernatural shimmer.
Pumpkin Spice Skull Cupcakes
Switch the chocolate base for pumpkin spice cupcakes topped with cream cheese frosting and skull decorations.
Serving Suggestions
-
Serve on a Halloween-themed tray decorated with fake spiderwebs or dry ice for a spooky, smoky effect.
-
Pair with warm apple cider, hot chocolate, or Halloween punch.
-
For parties, create a cupcake display alongside jack-o’-lantern cookies and candy corn for a full dessert spread.
Storage and Make-Ahead Tips
-
Cupcakes: Store unfrosted cupcakes in an airtight container at room temperature for up to 2 days or freeze for up to 3 months.
-
Frosted cupcakes: Keep in the fridge for up to 3 days. Bring to room temperature before serving.
-
Skull toppers: Store at room temperature in a sealed container until ready to use.
Frequently Asked Questions
Can I use boxed cake mix?
Yes! A chocolate cake mix works perfectly for this recipe. Just follow the package instructions, then add your homemade frosting and skull decorations for a custom touch.
How do I make the frosting jet-black?
Start with a chocolate base or dark buttercream, then add black gel coloring gradually. Let the frosting sit for 30 minutes—colors deepen as they rest.
Can I make these gluten-free?
Yes! Substitute the flour with a 1:1 gluten-free baking blend. The results will still be moist and delicious.
Are there nut-free options?
This recipe doesn’t contain nuts, but always check candy skull ingredients if buying pre-made.