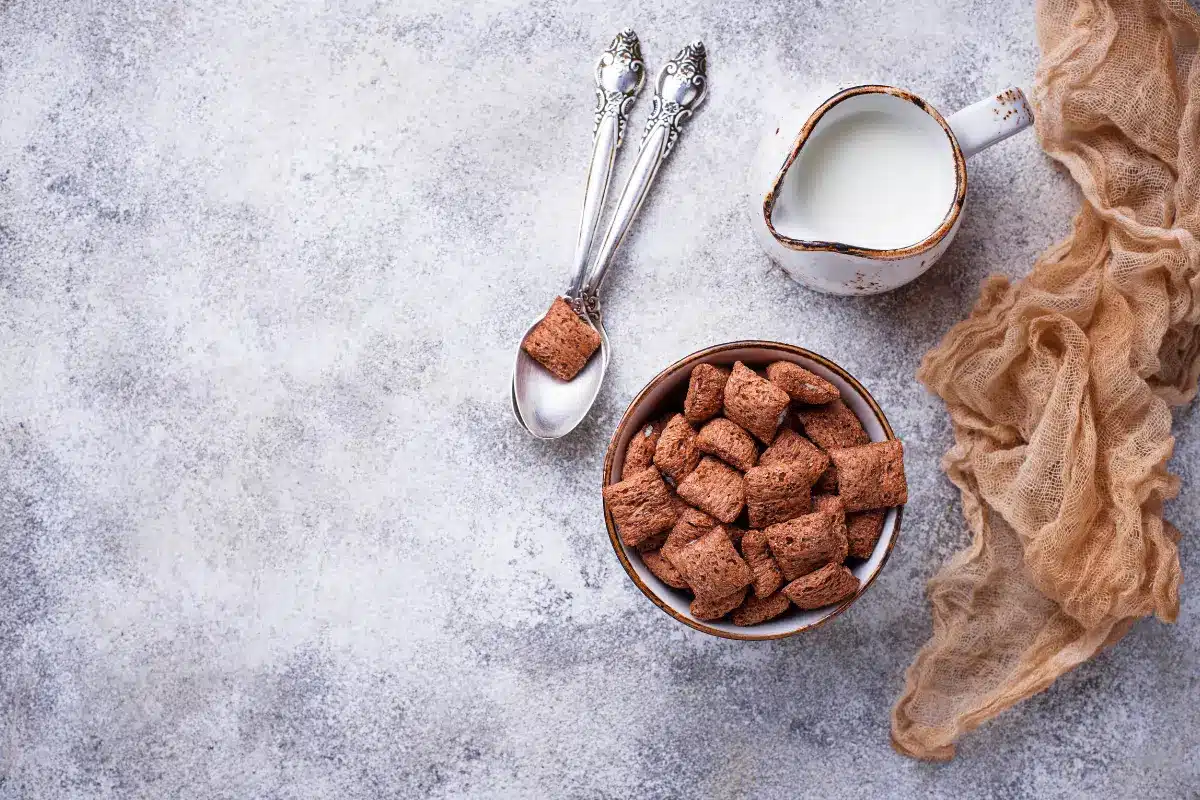
In the delightful realm of homemade treats, the humble cocoa puff stands out as a nostalgic nod to childhood mornings, now reimagined with a gourmet twist. This article isn’t just another recipe; it’s a journey through the art of crafting the perfect cocoa puff from scratch, tailored for everyone from the novice baker to the seasoned chef. Along the way, we’ll explore the intricacies of choux pastry, the richness of chocolate pastry cream, and the silky finish of chantilly frosting. Each bite promises a transportive experience, reminiscent of early rays of sunlight paired with the excitement of a new day. Without further ado, let’s dive into the world of homemade cocoa puffs, where tradition meets innovation on your breakfast table.
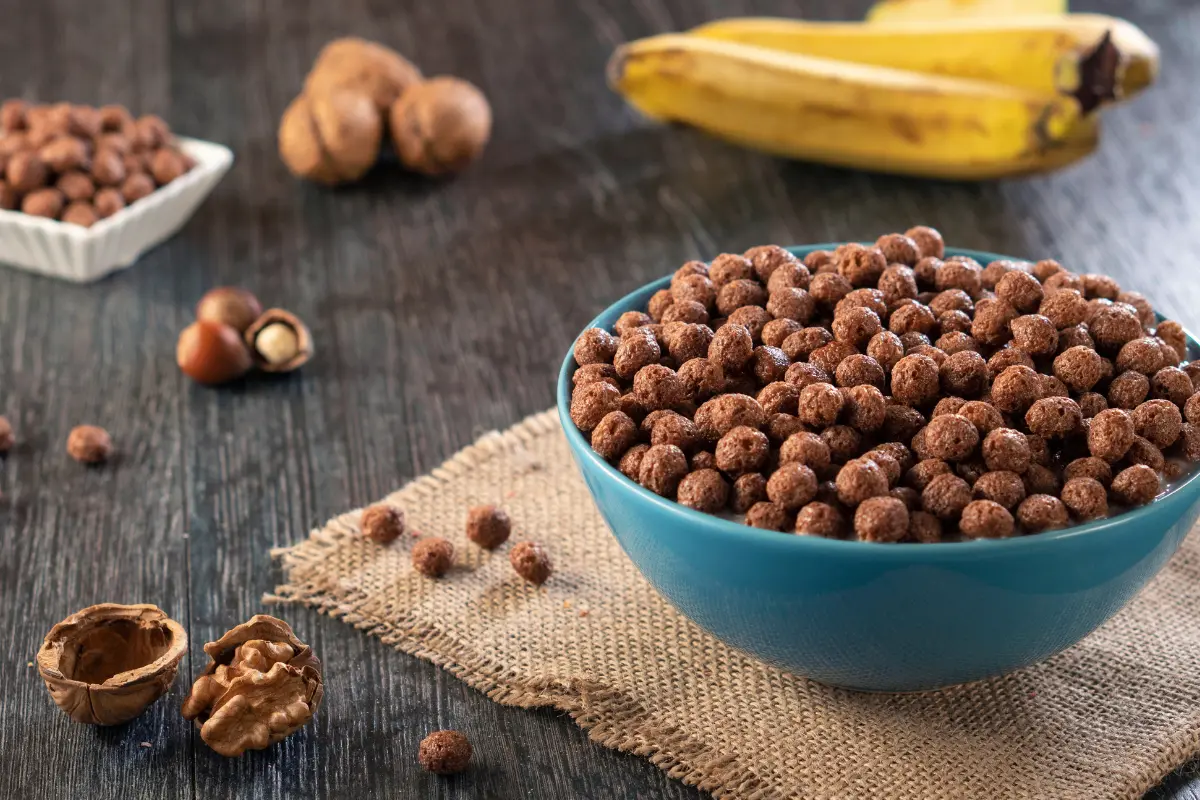
Cocoa Puffs
Imagine, if you will, a kitchen filled with the warm, comforting aroma of baking, where each cocoa puff emerges as a testament to your culinary skills. The magic of homemade cocoa puffs lies not just in their taste but in the joy of creation. Far from the store-bought versions, these delights offer a freshness and quality that only handcrafted goods can provide. Moreover, making cocoa puffs at home allows for a level of customization and health-consciousness often missing from their commercial counterparts.
Why Homemade?
Opting for the homemade route comes with a plethora of benefits. Firstly, it’s a nod to healthier eating. By controlling the ingredients, you can adjust the sugar levels, opt for gluten-free or vegan alternatives, and eliminate preservatives, making your cocoa puffs as indulgent or as wholesome as you desire. Secondly, the act of baking from scratch is incredibly rewarding. There’s something truly special about sharing a batch of cocoa puffs that you’ve made with love, especially when they’re as delicious as the ones we’re about to make.
A Bit of Background
Cocoa puffs have a storied history, with their roots tracing back to cereal bowls filled with chocolatey goodness. However, our recipe takes inspiration from the world of patisserie, specifically the famed Liliha Bakery in Hawaii, known for their exquisite cocoa puffs. This recipe is a tribute to those delightful treats, blending the essence of childhood favorites with the sophistication of French baking techniques.
Getting Started
Before we embark on this baking adventure, ensure you have all your ingredients and tools at the ready. From the crisp choux pastry to the velvety chocolate filling and the luxurious chantilly frosting, each component plays a pivotal role in creating the perfect cocoa puff. So, preheat your ovens, and let’s begin the journey to making the most delightful homemade cocoa puffs, filled with love, flavor, and a touch of nostalgia.
In the next section, we’ll delve into the ingredients and tools needed to bring these cocoa puffs to life. Stay tuned, for our culinary adventure is just getting started, and it promises to be both delicious and enlightening.
Ingredients and Tools Needed for cocoa puffs
Diving into the heart of our cocoa puff adventure, it’s essential to start with a roadmap—namely, the ingredients and tools that will transform raw components into delightful treats. Here’s what you’ll need to embark on this baking quest. Each ingredient is a building block to flavor, and every tool, an instrument of creation.
Ingredients List
Choux Pastry:
- 1 cup water
- 4 ounces butter
- 1 cup flour
- 4 eggs
Chocolate Pastry Cream Filling:
- 3 tablespoons sugar
- 3 egg yolks
- 3 tablespoons flour
- ½ teaspoon vanilla extract
- 2 cups milk
- 1 tablespoon butter
- 2 ounces baking chocolate, grated
For the Chantilly Frosting:
- 1 cup evaporated milk
- 1 cup sugar
- 3 egg yolks, beaten
- ½ cup butter
- 1 teaspoon vanilla extract
- ¼ teaspoon salt
Required Kitchen Tools
To bring these cocoa puffs to fruition, your kitchen arsenal should include:
- A large saucepan for the pastry and frosting preparations
- A wooden spoon or spatula for mixing
- A whisk for incorporating air and ensuring smooth mixtures
- Measuring cups and spoons for precise ingredient quantities
- A baking sheet lined with foil or parchment paper for baking the puffs
- A pastry bag with a wide tip for piping the choux pastry and filling the puffs
- A mixing bowl for preparing the chocolate filling and frosting
With these ingredients and tools at your disposal, the path to creating homemade cocoa puffs is clear. Remember, the quality of your ingredients will directly influence the taste of your final product, so choose them with care. Likewise, having the right tools on hand will make the process smoother and more enjoyable.
As we gear up to delve into the crafting process, it’s essential to approach it with patience and enthusiasm. Baking is as much about the journey as it is about the delicious destination. So, take a moment to gather your ingredients and tools, and prepare for the delightful task of mixing, whisking, and baking your way to cocoa puff perfection.
In our next installment, we’ll walk through the step-by-step process of preparing the choux pastry, a fundamental component of our cocoa puffs. This delicate pastry will serve as the foundation for our chocolate-filled delights, setting the stage for a texture and flavor that’s truly unparalleled. Stay tuned as we continue to explore the art and science of homemade cocoa puff creation.
Step-by-Step Recipe Guide
Now that we’ve gathered our ingredients and prepped our tools, it’s time to roll up our sleeves and dive into the heart of baking. Crafting homemade cocoa puffs is a delightful endeavor, starting with the foundation of any good puff: the choux pastry. Follow these steps closely, and you’ll be on your way to creating a treat that’s both tender and tantalizing.
Preparing the Choux Pastry
The choux pastry is a marvel of baking, light yet structured, ready to encapsulate our rich chocolate filling. Here’s how to create it:
- Start with the Basics: Preheat your oven to 400°F (200°C). This high initial temperature is crucial for creating steam within the dough, causing it to puff up beautifully.
- Heat and Mix: In a large saucepan, combine 1 cup of water and 4 ounces of butter. Bring to a boil over medium heat. Once boiling, remove from heat and immediately add 1 cup of flour. Stir vigorously with your wooden spoon or spatula until a smooth dough forms and begins to pull away from the sides of the pan.
- Egg Incorporation: Let the dough cool slightly. Add the eggs, one at a time, beating well after each addition. Your dough should be smooth and glossy, with a sticky consistency.
- Pipe and Bake: Line your baking sheet with foil or parchment paper. Using your pastry bag, pipe small balls of dough onto the sheet, leaving space for them to expand. Bake at 400°F for 15 minutes, then reduce the temperature to 325°F and continue baking for another 30 minutes or until they’re golden and dry to the touch.
Making the Chocolate Pastry Cream Filling
While your choux pastry puffs cool, it’s time to prepare the decadent chocolate filling that makes these cocoa puffs truly irresistible.
- Mix Dry Ingredients: In a saucepan, whisk together 3 tablespoons of sugar, 3 egg yolks, and 3 tablespoons of flour. Add ½ teaspoon of vanilla extract for an aromatic depth.
- Heat Milk: In a separate saucepan, combine 2 cups of milk and 1 tablespoon of butter. Heat until just scalding, then gradually pour into your egg mixture, whisking continuously to prevent curdling.
- Thicken and Flavor: Return the mixture to low heat, stirring constantly until it thickens and reaches a boil. Add 2 ounces of grated baking chocolate, continuing to stir until fully melted and the mixture is smooth.
- Cool: Pour the filling into a bowl, covering with plastic wrap directly on the surface to prevent a skin from forming. Refrigerate until cool and set.
Creating the Chantilly Frosting
The final touch to our cocoa puffs is a light, sweet Chantilly frosting, a perfect complement to the rich chocolate filling.
- Combine Ingredients: In a saucepan, mix 1 cup of evaporated milk, 1 cup of sugar, 3 beaten egg yolks, ½ cup of butter, 1 teaspoon of vanilla extract, and ¼ teaspoon of salt.
- Cook to Perfection: Over medium heat, cook the mixture, stirring constantly, until it thickens—about 12 minutes. The constant stirring is key to a smooth, velvety frosting.
- Cool and Ready: Remove from heat and continue stirring until the mixture cools down and thickens further. It’s now ready to be used or stored for later use.
With our components prepared, we stand at the precipice of assembly. The choux pastries, now cool and airy, await their filling of luscious chocolate cream, soon to be adorned with a dollop of sweet Chantilly frosting. The anticipation builds as we move closer to the moment of completion, where each element combines to form the perfect bite of cocoa puff bliss.
In our next section, we’ll bring it all together, showcasing the assembly and final touches that transform these individual elements into the cocoa puffs of your dreams. Stay tuned, as the best is yet to come.
Assembly and Serving
With the choux pastry puffed to perfection, the chocolate pastry cream chilled to the ideal consistency, and the Chantilly frosting whipped into fluffy peaks, we’ve arrived at the moment where magic happens—the assembly of our homemade cocoa puffs. This final step transforms our individual components into the sumptuous treats we’ve been anticipating. Let’s proceed with the careful construction of these delightful cocoa puffs.
Assembly of Cocoa Puffs
- Prepare the Puffs: Begin by creating a small incision at the base of each choux pastry puff. This tiny aperture is your gateway to filling the puffs with chocolate cream, so precision is key.
- Fill with Chocolate Pastry Cream: Fit a pastry bag with a narrow nozzle and fill it with your chilled chocolate pastry cream. Insert the tip into the incision at the base of each puff and gently squeeze, filling the cavity with the rich, creamy chocolate. Feel the pastry slightly expand as it fills, a sign that you’re on the right path.
- Frost with Chantilly Cream: Now for the crowning glory—using a butter knife or a spatula, apply a generous dollop of Chantilly frosting atop each filled puff. The frosting should be thick enough to hold its shape, yet soft enough to spread with ease.
Serving Suggestions
- Presentation is Key: Arrange your cocoa puffs on a beautiful serving platter. A dusting of powdered sugar or cocoa powder can add an extra touch of elegance, making each puff not only a treat for the palate but also a feast for the eyes.
- Pairing: Homemade cocoa puffs are best enjoyed with a cup of hot coffee or tea, creating a delightful contrast between the warm beverage and the cool, creamy filling. For the little ones, a glass of cold milk is the perfect accompaniment.
- Storage: Should you find yourself with leftovers, though unlikely, store them in an airtight container in the refrigerator. They’re best enjoyed within 1-2 days, ensuring the pastry remains crisp and the filling, creamy.
Creating homemade cocoa puffs is more than just following a recipe; it’s about weaving together textures and tastes, about the anticipation of that first bite, and the joy shared with each puff served. Whether for a special occasion or a delightful weekend treat, these cocoa puffs promise to bring smiles and satisfaction.
Our journey doesn’t end here. The beauty of baking lies in experimentation and adaptation. In the following section, we’ll explore variations and creative twists to keep your cocoa puff adventure fresh and exciting. Stay tuned, for creativity knows no bounds in the kitchen.
benefits of making Cocoa Puffs at home
Additional Tips and Tricks cocoa puffs
As we edge closer to mastering the art of cocoa puff creation, let’s sprinkle in some expert tips and tricks. These insights will elevate your baking, ensuring your cocoa puffs are not just homemade but carry a signature of excellence and personal touch. Whether you’re aiming for perfection or just looking to add a bit of pizzazz to your puffs, these tidbits of wisdom are sure to help.
Achieving the Perfect Dough Consistency
- The Windowpane Test for Choux Pastry: After adding the eggs, test the dough by lifting a spoonful and stretching it. If it forms a triangle shape that slowly breaks, you’ve achieved the right consistency. This elasticity is crucial for puffs that rise and stay light.
Enhancing Flavor and Texture
- Infuse Your Milk: For both the chocolate pastry cream and Chantilly frosting, consider infusing the milk or cream with a vanilla pod, citrus zest, or even spices like cinnamon or nutmeg. This subtle infusion adds depth to your cocoa puffs, making them truly unique.
- Chocolate Quality Matters: When it comes to the pastry cream filling, the quality of the chocolate can make a world of difference. Opt for a high-quality baking chocolate with a cocoa content that suits your taste for a richer, more decadent filling.
Presentation and Storage
- A Dusting Makes a Difference: Before serving, a light dusting of powdered sugar or unsweetened cocoa powder not only adds an elegant touch but also contrasts beautifully with the Chantilly frosting, enhancing the visual appeal of your cocoa puffs.
- Storing for Freshness: If you must store the assembled cocoa puffs, place them in a single layer in an airtight container in the refrigerator. To maintain the best texture, let them come to room temperature for a few minutes before serving.
Troubleshooting Common Issues
- If Your Puffs Won’t Puff: Oven temperature is often the culprit. Make sure your oven is accurately preheated and avoid opening the door during the initial baking period. The steam needs to build up to puff the pastry.
- For Runny Pastry Cream: Patience is key. If your pastry cream hasn’t thickened after the suggested cooking time, keep stirring over low heat. Remember, it will continue to thicken as it cools.
Embracing Creativity
- Experiment with Fillings: Beyond chocolate, consider experimenting with other fillings like vanilla bean pastry cream, salted caramel, or even fruit compotes. Each filling can offer a new dimension to your cocoa puffs.
- Decorate with Flair: Use the Chantilly frosting as a canvas for your creativity. A sprinkle of chocolate shavings, zest, or even edible flowers can add color and intrigue to your cocoa puffs, making them as beautiful as they are delicious.
Baking is a journey of discovery, filled with moments of triumph and learning opportunities. These tips and tricks serve as guideposts along the way, encouraging you to explore, adapt, and ultimately, create cocoa puffs that are a reflection of your unique culinary voice.
In the final part of our cocoa puff saga, we’ll explore variations on the classic recipe, inviting you to think outside the box and personalize your puffs. Stay tuned as we wrap up with a flourish, celebrating the joy and creativity that baking brings into our lives.
FAQs about cocoa puffs
Baking is both an art and a science, teeming with questions and curiosities, especially when it comes to perfecting homemade cocoa puffs. Let’s dive into some frequently asked questions that might pop up during your baking journey, providing clarity and confidence as you whip up these delightful treats.
Can I Make Cocoa Puffs Gluten-Free?
Absolutely! To make your cocoa puffs gluten-free, substitute the all-purpose flour in the choux pastry and chocolate pastry cream filling with your favorite gluten-free flour blend. Ensure it’s a 1:1 baking blend for the best results. Gluten-free baking can be just as delicious, and it opens up your homemade treats to those with dietary restrictions.
Is There a Vegan Option for This Recipe?
Yes, there is! For the choux pastry, use plant-based butter and a reliable egg substitute, like aquafaba, to mimic the properties of eggs. For the chocolate pastry cream, opt for almond milk or coconut milk, and use vegan chocolate. Lastly, the Chantilly frosting can be made with coconut cream and vegan butter. Vegan baking is a wonderful way to explore alternative ingredients that are both kind to the planet and your body.
How Can I Ensure My Choux Pastry Puffs Up Properly?
The key to perfectly puffed choux pastry lies in the moisture content, which turns into steam and causes the pastry to expand. Make sure your dough is the correct consistency before adding eggs—one that forms a smooth ball that pulls away from the sides of the pan. Adding the eggs one at a time is crucial, as is baking at a high temperature initially to create that initial burst of steam.
Can I Prepare Any Components Ahead of Time?
Indeed, you can! The chocolate pastry cream filling and Chantilly frosting can both be made ahead and stored in the refrigerator. The pastry cream will thicken as it cools, and the frosting’s flavor will deepen overnight. Preparing these components in advance can break up the baking process and make assembly a breeze.
What If My Cocoa Puffs Are Too Dry or Too Moist?
The texture of your cocoa puffs can vary based on several factors, including oven temperature and humidity. If they’re too dry, they may have been overbaked. Next time, reduce the baking time slightly. If they’re too moist, ensure you’re baking them at the right initial temperature and that they have enough time to dry out in the oven. Remember, baking is a practice of patience and precision, and each batch teaches you something new.
These FAQs cover just the tip of the baking iceberg. As you continue your journey in making homemade cocoa puffs, you’ll discover more about the nuances of baking and, most importantly, about your preferences and creativity as a baker. The journey is as delightful as the destination, so keep experimenting, keep learning, and most of all, keep enjoying the process.
With our questions answered and curiosities addressed, let’s move forward. In our next section, we’ll share additional tips and tricks to enhance your baking experience, ensuring your cocoa puffs are not just good but great. Stay tuned, as we dive deeper into the art of making the perfect homemade cocoa puff.