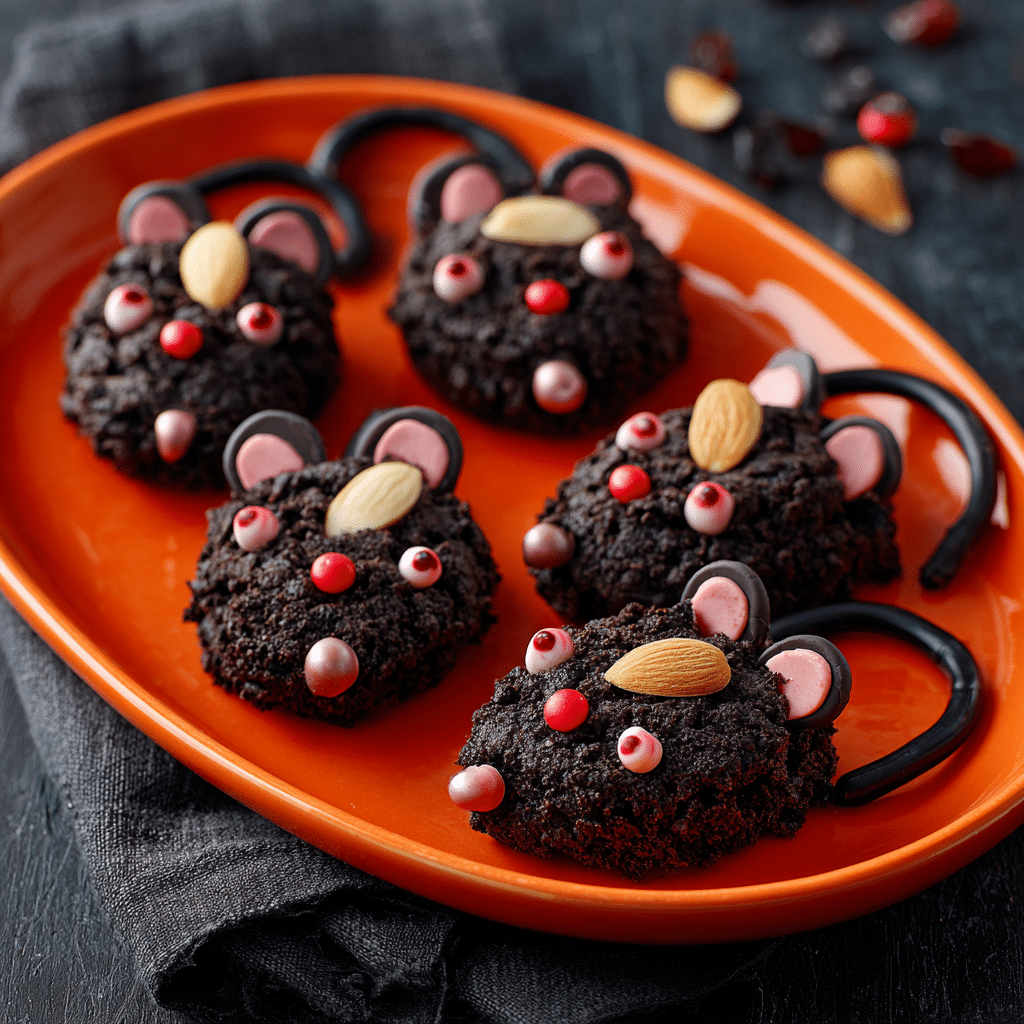
Halloween is the time when desserts get a playful, spooky twist, and nothing says whimsical quite like Chocolate Mice. These little creatures are equal parts creepy and cute, making them a perfect addition to any October dessert table. Made with simple ingredients like cherries, chocolate, and cookies, they’re easy to assemble, fun to decorate, and guaranteed to get a few double-takes from your guests.
Whether you’re planning a haunted house spread, surprising kids with a playful treat, or adding a quirky element to a dessert platter, these edible mice are the perfect conversation starter. And the best part? They taste as good as they look.
Why You’ll Love Chocolate Mice
-
Spooky yet adorable – Perfect balance of cute and creepy.
-
Easy to make – No fancy baking skills needed.
-
Kid-friendly project – A fun Halloween activity for children.
-
Customizable – Decorate them however you like: scary, silly, or sparkly.
-
Delicious bite-sized treats – A mix of chocolate, cherries, and cookies.
These little critters will quickly become a Halloween tradition in your home.
Ingredients You’ll Need
The beauty of chocolate mice is that they use simple, easy-to-find ingredients.
For the Mice Bodies
-
1 jar maraschino cherries with stems (drained and patted dry)
-
12 oz (340g) semi-sweet or dark chocolate chips (or melting wafers)
-
1 tbsp shortening or coconut oil (optional, for smoother chocolate)
For the Heads and Ears
-
Hershey’s Kisses or similar chocolate candies
-
Sliced almonds (for ears)
For Decoration
-
Red or black gel icing (for eyes and noses)
-
White chocolate chips or candy eyes (optional)
-
Shredded coconut, cocoa powder, or sprinkles (optional, for coating)
Step-by-Step Instructions
1. Prepare the Cherries
Drain the maraschino cherries well and pat them dry with paper towels. Too much moisture will cause the chocolate to seize, so dry them thoroughly.
2. Melt the Chocolate
In a microwave-safe bowl, melt chocolate chips (and optional shortening) in 20–30 second intervals, stirring between each, until smooth and glossy.
Alternatively, use a double boiler for more control.
3. Dip the Cherries
Holding each cherry by its stem, dip it into the melted chocolate until completely coated. Place on a parchment-lined baking sheet.
The stem will serve as the mouse’s tail.
4. Attach the Head
While the chocolate is still wet, press a chocolate kiss onto the cherry opposite the stem to form the head.
5. Add the Ears
Insert two sliced almonds between the cherry and the kiss to create ears. Adjust positioning so they resemble little mouse ears.
6. Decorate the Face
Once the chocolate sets slightly, use gel icing or melted white chocolate to add eyes and a nose. Candy eyes can also be pressed on for extra cuteness (or creepiness!).
7. Let Them Set
Refrigerate the tray for about 15 minutes, or until the chocolate is firm.
Serving Suggestions
Chocolate mice are perfect for:
-
Halloween dessert tables – Scatter them around like creepy critters.
-
Kids’ parties – Add them to cupcake toppers or cookie platters.
-
Gift boxes – Wrap a few in cellophane bags tied with ribbon.
-
Spooky charcuterie boards – Mix them with candy, popcorn, and pretzels.
Make-Ahead and Storage Tips
-
Room Temp: Store in an airtight container for up to 2 days.
-
Refrigerator: Lasts up to 1 week (though almonds may soften).
-
Freezer: Not recommended—freezing can alter the chocolate texture.
Fun Variations
Want to make your mice even more unique? Try these:
1. White Chocolate Ghost Mice
Dip cherries in melted white chocolate instead of dark, and use black gel for spooky ghost faces.
2. Sparkly Witches’ Mice
Roll freshly dipped mice in edible glitter or colored sanding sugar.
3. Bloody Vampire Mice
Use red gel icing around the mouth for a vampire-inspired effect.
4. Almond Joy Mice
Use coconut flakes in the coating for a tropical twist.
Tips for Perfect Chocolate Mice
-
Dry cherries completely before dipping—moisture ruins melted chocolate.
-
Work quickly – Chocolate sets fast, so attach kisses and almonds right away.
-
Use parchment paper – Prevents sticking and helps mice hold their shape.
-
Get creative – Not every mouse has to look the same—quirky faces are part of the fun.
Frequently Asked Questions
Can I make these without cherries?
Yes! You can use round truffles, cookie dough bites, or cake pops as the base.
What can I use instead of Hershey’s Kisses?
Any small cone-shaped chocolate candy works—try Rolos or homemade ganache domes.
Are these safe for kids with nut allergies?
Skip the almond ears and use candy melts piped into ear shapes instead.
Do the mice taste strongly of cherry?
The cherry flavor is subtle once coated with chocolate, but it adds a juicy bite.
