Diving into the world of sushi, especially the Boston roll, is akin to embarking on a culinary adventure that tantalizes your taste buds while introducing you to the artistry of Japanese cuisine with an American twist. This article aims to guide you through the process of creating the perfect Boston roll at home, from gathering the right ingredients to mastering the roll itself. Along the way, we’ll explore the origins of this delightful dish, offer tips for making your sushi rice just right, and suggest variations to customize your rolls to your liking. So, roll up your sleeves, and let’s get rolling!
Sushi lovers, rejoice! The Boston roll offers a scrumptious twist on traditional sushi that’s perfect for both novices and seasoned sushi enthusiasts. This section will dive into what makes a Boston roll uniquely delightful, its roots, and why it’s become a beloved variant in the sushi world.
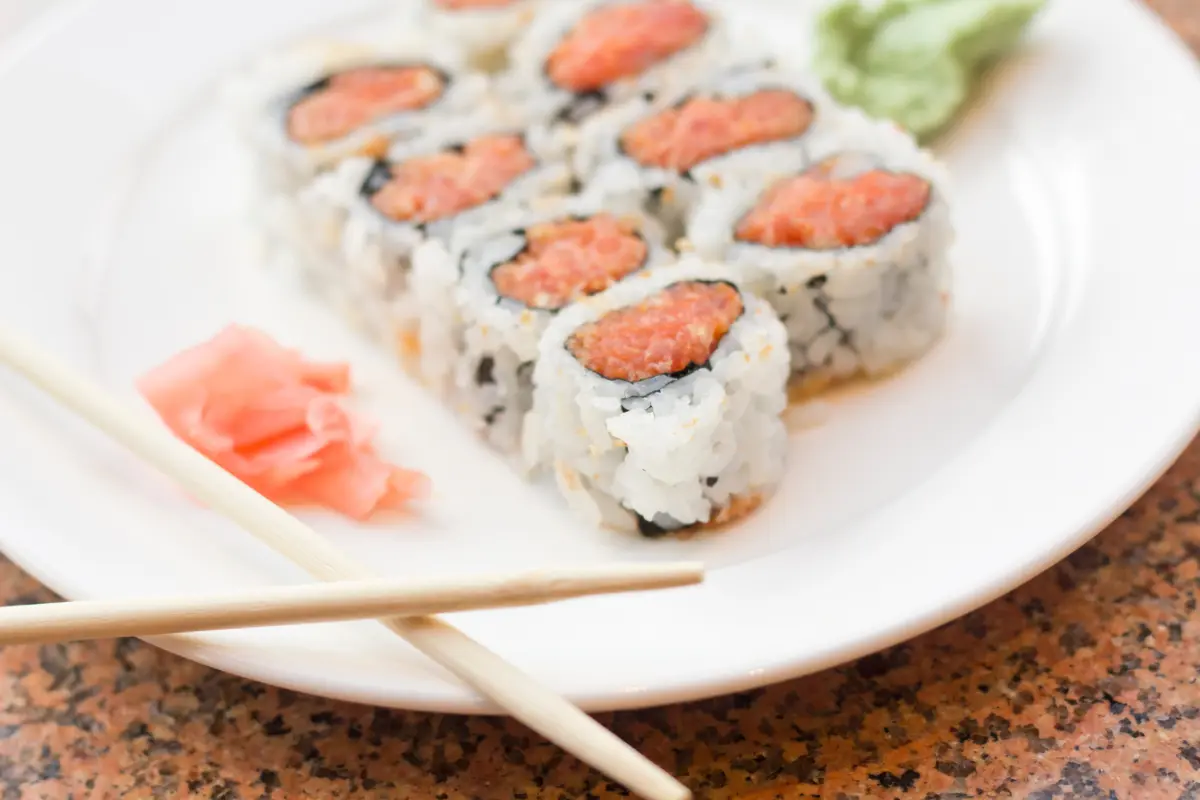
What is a Boston Roll?
At its core, the Boston roll is a sushi masterpiece that combines the creamy texture of avocado, the crispness of cucumber, and the sweet, tender flavor of poached shrimp, all wrapped in a snug blanket of sushi rice and nori. Unlike its cousin, the California roll, the Boston roll ups the ante with its inclusion of seafood, making it a hit among those who crave a bit more from their sushi.
The Origin of Boston Roll
Interestingly, the Boston roll is a testament to the fusion of Japanese culinary techniques with American tastes. Originating from the eastern shores of the U.S., it represents a creative adaptation of traditional sushi, substituting raw fish with cooked shrimp for a palatable delight that appeals to a wide audience.
Popularity and Cultural Significance
Why has the Boston roll carved out a niche for itself in the vast sushi universe? Well, it’s not just about the flavors. This roll symbolizes the blending of cultures, showcasing how culinary traditions from different parts of the world can come together to create something new, exciting, and universally loved. Its popularity also speaks volumes about the evolving American palate and the growing appreciation for sushi outside of Japan.
Transitioning smoothly from the origins and essence of the Boston roll, our next section will guide you through the essential ingredients and preparations needed to bring this culinary delight to your dining table. Stay tuned as we delve deeper into the art of sushi making, ensuring you’re well-equipped to craft your very own Boston roll with confidence and flair.
Ingredients and Preparations
Before we dive into the nitty-gritty of rolling our sushi, let’s gather all the necessary ingredients. A well-prepared chef is halfway to creating a masterpiece, after all. Here’s what you’ll need for your Boston roll adventure:
Essential Ingredients for Boston Roll
- Nori seaweed sheets: 2 (halved)
- Sushi rice (uncooked): 1 cup
- Water: 1 cup for rice, more for poaching shrimp
- Salt: ½ teaspoon for rice, more for seasoning water
- Rice vinegar: 3 tablespoons
- Medium shrimp (about 14 oz or 400 g): 16, poached
- Cucumber: 1, cut into ½-inch sticks
- Avocado: 1, peeled, pitted, and sliced into thin strips
- Tobiko or masago: ⅓ cup or as needed
Preparing the Ingredients
How to Poach Shrimp
First things first, let’s poach those shrimp to perfection. Fill a large pot with water, add a generous pinch of salt, and bring it to a boil. Add your shrimp, cover, and remove from heat. Let them sit until they’re cooked through, about 3-6 minutes, then plunge them into ice water to stop the cooking process. Once cool, drain and set aside.
Preparing Sushi Rice
Sushi rice is the foundation of any good sushi roll. Start by rinsing your rice under cold water until the water runs clear. Cook it with an equal amount of water and let it cool down to room temperature. Then, gently fold in your rice vinegar and salt. This will give your rice that signature sushi flavor and the perfect sticky texture for rolling.
Cutting Vegetables for the Roll
While your rice cools, take the time to prep your veggies. Slice your cucumber into long, thin sticks, and do the same with your avocado. These will add that crunch and creaminess to your roll, balancing out the flavors and textures beautifully.
With our ingredients prepped and ready to go, we’re all set to start rolling our Boston rolls. But, before we get our hands sticky with rice, let’s take a moment to appreciate the simplicity and beauty of these ingredients coming together. In the next section, we’ll walk through the steps of assembling and rolling your sushi like a pro. So, sharpen your knives, and let’s keep the ball rolling!
Crafting the Perfect Boston Roll

Now that we’ve got our ingredients prepped and ready, it’s time to roll up our sleeves and dive into the art of sushi rolling. Crafting the perfect Boston roll is a skill that comes with practice, but with these step-by-step instructions, you’ll be well on your way to impressing friends and family with your sushi-making prowess.
Step-by-Step Guide to Making Boston Roll
Preparing the Sushi Mat
First off, cover your bamboo sushi mat with plastic wrap. This little trick prevents rice from sticking to the mat and makes cleanup a breeze. Trust me, it’s a game-changer for sushi enthusiasts!
Rolling the Sushi
Lay a half sheet of nori, shiny side down, on your prepared mat. Wet your hands (this keeps the rice from sticking) and grab a handful of your seasoned sushi rice. Gently spread the rice over the nori, leaving about an inch of space at the top. Sprinkle a thin layer of tobiko or masago over the rice for that extra crunch and flavor. Then, flip the nori over so the rice is facing down.
Now, it’s time for the fillings. Line up your poached shrimp, cucumber sticks, and avocado slices along the bottom edge of the nori. Remember, less is more here; overfilling can make the roll difficult to close.
With everything in place, it’s showtime. Roll the bamboo mat away from you, applying gentle pressure to form a tight roll. Once you’ve got a nice, compact cylinder, unwrap it and voila! You’ve got yourself a Boston roll.
Cutting the Roll
Using a sharp, wet knife, slice your roll into 6-7 pieces. The key here is to use a gentle sawing motion and to clean your knife between cuts. This ensures each piece is beautifully presented, with all the fillings neatly contained.
Tips and Tricks for Perfect Sushi Rolls
- Keep it tight: A tight roll is crucial for sushi. It keeps the fillings secure and makes the roll easier to eat.
- Wet your knife: A wet knife slices through sushi like butter, giving you clean, precise cuts.
- Practice makes perfect: Don’t be discouraged if your first few rolls aren’t perfect. Sushi rolling is an art that takes time to master.
- Serving and Presentation Ideas
Presentation is key in Japanese cuisine. Arrange your Boston rolls on a platter, garnish with extra tobiko or masago, and serve with soy sauce, wasabi paste, and spicy mayo on the side. A beautifully presented dish not only looks appetizing but also enhances the overall dining experience.
And there you have it, folks! You’re now equipped with the knowledge and skills to create delicious Boston rolls at home. Remember, the beauty of sushi lies in its versatility, so feel free to experiment with different fillings and techniques. Happy rolling!
Variations and Customizations

Crafting the perfect Boston roll is just the beginning of your sushi-making journey. The beauty of sushi lies in its versatility, allowing for endless variations and customizations to suit any palate. Let’s explore some creative twists on the classic Boston roll and how you can make each roll uniquely yours.
Creative Variations of Boston Roll
The traditional Boston roll is a delightful mix of poached shrimp, cucumber, and avocado. However, the world of sushi is your oyster, and there’s plenty of room to get creative. Here are a few ideas to get you started:
- Tempura Twist: Swap out the poached shrimp for shrimp tempura to add a crunchy texture to your roll. The contrast between the crispy shrimp and the soft rice creates a mouthwatering experience.
- Spicy Mayo Drizzle: For those who enjoy a bit of heat, drizzling spicy mayo over the top of your Boston roll can add a spicy kick that elevates the flavors.
- Vegetarian Option: Replace the shrimp with tempura vegetables or tofu for a vegetarian-friendly version that doesn’t skimp on flavor.
Dietary Adjustments and Substitutions
Sushi is wonderfully adaptable, making it easy to accommodate various dietary needs and preferences. Here are some adjustments and substitutions to consider:
- Gluten-Free: Use gluten-free soy sauce and ensure your tempura batter (if using) is gluten-free to make your rolls suitable for those with gluten sensitivities.
- Low-Carb: Swap out the sushi rice for cauliflower rice for a low-carb alternative that still satisfies your sushi cravings.
Tips for Customizing Your Rolls
- Experiment with Fillings: Don’t be afraid to try different combinations of fillings. Avocado, cucumber, and shrimp are just the beginning. Think outside the box with mango, bell peppers, or even cream cheese.
- Play with Toppings: Toppings like tobiko, sesame seeds, or thinly sliced avocado can add texture and visual appeal to your rolls. Get creative and make each roll a work of art.
In the world of sushi, the possibilities are truly endless. Whether you stick to the classic Boston roll or venture into new culinary territories, the key is to have fun and enjoy the process. After all, the best meals are those made with a dash of creativity and a sprinkle of love.
Stay tuned for our next section, where we’ll tackle some of the most frequently asked questions about making Boston rolls. Whether you’re a sushi novice or a seasoned pro, there’s always something new to learn in the kitchen.
Frequently Asked Questions
Embarking on your sushi-making journey, especially when it comes to crafting the perfect Boston roll, might stir up a sea of questions. Fear not, for we’ve gathered some of the most common inquiries and provided answers to help smooth out any wrinkles in your sushi endeavors.
Can I use cooked crab instead of shrimp?
Absolutely! The beauty of sushi, particularly the Boston roll, lies in its versatility. Cooked crab, whether it’s imitation crab sticks or real crab meat, can be a delicious alternative to shrimp. It offers a slightly different flavor profile but retains that seafood essence that’s crucial to the roll’s identity.
What can I use instead of tobiko or masago?
For those who might not have access to tobiko or masago, or simply prefer something different, there are several alternatives. Sesame seeds, both black and white, can add a nutty flavor and a decorative touch. Chopped scallions or thinly sliced avocado can also serve as a garnish, adding both flavor and visual appeal to your Boston roll.
How do I make my sushi rice sticky?
The key to perfect sushi rice lies in the preparation. After cooking your rice, ensure you season it with a mixture of rice vinegar, sugar, and salt. This not only flavors the rice but also gives it that signature sticky texture ideal for sushi. Remember, the rice should be cooled to room temperature before you start rolling to prevent it from becoming too mushy.
Can I prepare the ingredients in advance?
Yes, you can! Prepping your ingredients ahead of time can make the rolling process much smoother. Cooked shrimp, sliced vegetables, and even the seasoned rice can be prepared a few hours in advance. Just be sure to cover the rice with a damp cloth to keep it from drying out and store your prepped ingredients in the refrigerator until you’re ready to roll.
How do I prevent my sushi from falling apart?
Ensuring your sushi doesn’t fall apart comes down to a few key factors: the right amount of filling, properly sticky rice, and a tight roll. Be careful not to overfill your sushi, as this can make it difficult to roll tightly. Using a bamboo mat covered in plastic wrap can help you achieve a compact roll that holds together beautifully.
With these FAQs addressed, you’re now armed with the knowledge to tackle some of the most common challenges in sushi making. Remember, practice makes perfect, and each roll you make brings you one step closer to becoming a sushi master in your own right. Stay tuned for our concluding thoughts and final tips to elevate your Boston roll game to the next level.